Saturday, May 28, 2011

RIP, Basil.


Goodbye, little basil plant. I am not sad to see you go. I paid $4 for you and only got one decent harvest before you shriveled into this pathetic heap of self pity. That's ridiculous. I can get a bunch of fresh basil from Kroger for $3. It would have been worth it if you were as beautiful and healthy as my neighbor's basil plant. You always looked so puny in comparison and I felt ashamed. Come on, I only over-watered you once! Did you really have to react like this? Tomorrow I will pull you up by your roots and throw you away. I will replace you with something that is more appreciative of all my tender love and care, something that can handle my shady, humid, scorching-hot, urban garden. Like a cactus.


Hold on, little parsley plant! Don't give up yet! I'm so sorry for the over-watering. Ina Garten told me that the more I cut you, the more you will grow. Those few little leaves popping up since I followed her advice are giving me hope. I don't know if you were worth the $4 investment, either, though. For $0.50 I can get a big bunch of beautiful organic flat leaf parsley that lasts all week. I haven't even had one harvest out of you. If you don't get your act together, you may meet the same fate as the basil. Yes, that is a threat.

Tuesday, May 24, 2011

PHENOMENAL turkey burgers with blue cheese and caramelized onions


I know I know, I use the word "phenomenal" like it's going out of style, and my friends will tell you that- but really I only use it when something truly is PHENOMENAL! And these turkey burgers are- my hubby, who normally pokes fun at my thing for turkey burgers, LOVED them.  I originally saw this recipe in my new Food Network magazine, so that was my inspiration. I've adapted it so I have the adapted recipe here:


Ingredients:
  • 1 pkg ground turkey
  • 2 portobello mushrooms caps
  • 2 cloves minced garlic
  • a couple generous dashes of worcestershire
  • good pinch salt
  • some pepper
  • a couple dashes of onion powder
  • couple dashes of garlic powder
Toppings:
  • caramelized onions (see recipe under "delectable pan sauce")
  • blue cheese
  • lettuce, tomato, and the other usual suspects (but note: mustard and blue cheese don't mix well unless you're cra-cra- that's short for crazy.)
Directions:
  • dice up your portobello mushroom caps (after you've taken a damp paper towel and rubbed the dirt off of them)
  • heat up about 2 tablespoons of olive oil in a skillet over medium high heat
  • add your diced mushrooms and let them sautee (adding a good pinch of salt) for about 5 minutes, until they are golden brown in color.  then add your garlic and sautee for a couple more minutes
  • stick them in a bowl once they're done
 
don't freak out on me if you don't like mushrooms.  they add SUCH a rich flavor and "meatiness" (a word that is WAY over used in my opinion but there you have it) to the turkey burgers.  trust me
  • once the mushrooms have slightly cooled, add your turkey and the rest of your ingredients
  • call your husband in to do the gross part of mixing the meat with his bare hands (love you, honey)
  • grill them up  and at the very end, add your blue cheese.  top with your toppings and ENJOY these delectable turkey burgers.  
 those aren't both mine.....
ok yes they are.

***note: I served these with Kate's sweet potato wedges and some fresh grilled corn.  seriously, it was a HOME RUN.

Monday, May 23, 2011

Pasta Heaven

Lately I have been on a pasta kick. I can’t get enough. I crave it every day.

Could I be pregnant?

Haha just kidding. I’m not. Promise!

But I have been craving pasta and have been making LOTS of it. Last week I made this asian-inspired pasta… twice. It’s from www.eatingwell.com (which I am currently obsessed with) and I highly recommend the recipe. Here’s a lovely picture.


As a little added love-bonus, I added some chicken for my darling carnivore of a husband. I sliced a chicken breast into thin diagonal strips, marinated it in all the same flavors found in the pasta (soy sauce, lime, garlic, ginger), then sautéed it until cooked though.

Tonight I made a masterpiece. Not kidding, it belongs in a museum. Fennel-Leek-Sausage (optional) Pasta with Meredith’s Homemade Marinara Sauce.

Blast! How do I not have a picture? I forgot to take one, sorry!

You’re just going to have to trust me and use your imagination.

Make Meredith’s marinara sauce. You won’t be sorry. The recipe can be found under her entry entitled “Lasagna” that she put up in March. I didn’t have basil… because my basil plant hates me… So I used every other herb in my garden and it turned out splendidly.

(Side note: Did you know that you can use your fennel fronds as a fresh herb? It has a lovely, new, unfamiliar flavor that I just love. I added it to the pasta just before serving, and the freshness really gives the pasta an elevated dimension.)


This is fennel. If you aren't familiar with it, because it is kind of obscure, you should be! Try it! It's so good. And see those fluffy little ends on top? Those are the fronds. Use them as a garnish, in place or in additon to fresh herbs, to enhance that wonderful fennel flavor.

(Second side note: This is turning out to be a ridiculously long post. I’ll stop now and talk about the other stuff that I’m dying to tell you another day.)

Recipe: Roast some fennel and leeks in the oven (with the usual suspects: olive oil, salt, and pepper) at 375 degrees for about 45 minutes, stirring occasionally to keep them from burning. Combine with cooked whole wheat pasta and the marinara sauce… and some sausage for your darling carnivore of a husband :) Then die of happiness because you have been given the gift of this exquisite culinary experience.

Friday, May 20, 2011

it's all because of sara welch

...that I love orzo so much!!!  She made this INCREDIBLE roasted shrimp and orzo last week (see recipe here: http://www.foodnetwork.com/recipes/ina-garten/roasted-shrimp-and-orzo-recipe/index.html) and it has had me craving orzo since.  it's simple, it's delicious, and it's LIGHT.  So since I was craving orzo, I decided I would make yet another Barefoot Contessa recipe that Sara turned me on to, and it is her Orzo with Roasted Vegetables.  Real simple, and REAL delectable- I've never had one complaint.  I'm not gonna lie, when Sara made this last Easter and told me how good it was, I thought "I'm not convinced...it's just some roasted vegetables with orzo, right?" WRONG. the basil, the feta, the lemon viniagrette, the scallions....it all works together to make this INCREDIBLE dish that can be served as a side dish or a main dish (I served it with leftover chicken noodle soup and we were quite satisfied).  You need this in your life, people.

Here we go.
roast your vegetables

cook a packet of orzo (thank you for supplying my orzo, Camille!) according to the package and drain it into a large bowl
mix in your roasted vegetables with your orzo. let cool (I stuck it in the freezer to expedite the cooling process because I needed this goodness in my body ASAP)

go take the clothes off all of your basil, dice up some feta, and add it to your cooled orzo mix (I would have added scallions here but I didn't add any.  Her recipe also calls for pine nuts but they're expensive so I don't ever add them)
I interrupt this important new story to ask WHY AM I ADDICTED TO SALT AND VINEGAR CHIPS??? ok back to the recipe.

delectable. simple delectable.

you didn't think I was going to leave you out to dry and not give you the ACTUAL recipe did you?  

Ingredients:

  • 1 small eggplant, peeled and 3/4-inch diced
  • 1 red bell pepper, 1-inch diced
  • 1 yellow bell pepper, 1-inch diced
  • 1 red onion, peeled and 1-inch diced
  • 2 garlic cloves, minced
  • 1/3 cup good olive oil
  • 1 1/2 teaspoons kosher salt
  • 1/2 teaspoon freshly ground black pepper
  • 1/2 pound orzo 
Dressing:
  • 1/3 cup freshly squeezed lemon juice (2 lemons)
  • 1/3 cup good olive oil
  • 1 teaspoon kosher salt (add more as needed once everything is mixed together)
  • 1/2 teaspoon freshly ground black pepper 
Assembly:
  • 4 scallions, minced (white and green parts)
  • 1/4 cup pignolis (pine nuts), toasted
  • 3/4 pound good feta, 1/2-inch diced (not crumbled)
  • 15 fresh basil leaves, cut into julienne
Directions:
  • Preheat the oven to 425 degrees F.

  • Toss the eggplant, bell peppers, onion, and garlic with the olive oil, salt, and pepper on a large sheet pan. Roast for 40 minutes, until browned, turning once with a spatula.

  • Meanwhile, cook the orzo in boiling salted water for 7 to 9 minutes, until tender. Drain and transfer to a large serving bowl. Add the roasted vegetables to the pasta, scraping all the liquid and seasonings from the roasting pan into the pasta bowl.

  • For the dressing, combine the lemon juice, olive oil, salt, and pepper and pour on the pasta and vegetables while it's still warm. Let cool to room temperature, then add the scallions, pignolis, feta, and basil. Check the seasonings, and serve at room temperature.

This recipe stays good for at least a week and makes FABULOUS leftovers- it's worthier than being stuck in the "leftovers" category.  Thank you Sara, for introducing me to orzo and all of the delectable things you can do with it, and thank you, Ina Garten for your amazing recipes.  We adore you.  We'd like to come to your house for Thanksgiving, ok?  See you then. 


Wednesday, May 18, 2011

delectable pan sauce

Don't hate on me for not posting pics- here's the deal: often times in the kitchen i'm flying by the seat of my pants and i think "this might not turn out" so thus, i don't take pictures along the way.  I know, I know, it's no excuse to not take pictures of the final product, but i didn't. so sue me. HOWEVER, I DO want to discuss this most delicious pan sauce I made last night.  boy oh boy was it amazing.

So, I caramelized some onions (get some olive oil in a skillet, slice your onions thin, then toss them in with the skillet on high heat.  add a big pinch of salt and some fresh thyme, if you've got some)  turn the heat to medium-low and stir occasionally until the onions are WAY cooked down- like, deep golden in color and super slinky)

Then I put the onions on a plate, turn the heat back up, add some olive oil, and add some chicken that I've pounded thin and seasoned with S &P.  sear it on both sides, then stick it on a plate and let it hang out.

Now, with that pan nice and hot with lots of goody brown bits at the bottom, deglaze it with some white wine (i keep cooking wine because we don't always have white wine- it's not a "staple" as my husband says.  I beg to differ but that's for another discussion).  let this wine reduce a little bit, season it with salt and a touch of pepper.  you can also add a sprig of thyme if you've got it.

I also added some chicken stock, then I added the chicken and caramelized onions back to the skillet to continue cooking in this DELICIOUS liquid.  I boiled some rigatoni, added it to the pan, let them get soaked in the pan sauce, and served the chicken with the caramelized on top, rigatoni on the side, and sauteed some spinach for me green.

I know you can't see a picture, but trust me when i tell you it was incredible.  scott said how good it was three times- that's big, people. 

Tuesday, May 17, 2011

Blackberries in Lemon Creme... Among Other Things


It was my turn to make dessert for our small group last week, and I had to figure out something that would work for the three of us that are on the Daniel Fast and the three of us that aren't. I bought bunches of beautiful blackberries and strawberries (not pictured) and put them on top of some delectable homemade lemon cream for the ones who are not fasting. Even though I'm not supposed to have sugar, I may have had a little taste just to make sure it was good enough to serve :) ... It was delectable, and a nice twist on the traditional whipped cream that usually accompanies springtime berries. It's incredibly simple:


Combine approximately 2 1/4 cups of heavy whipping cream, 6 tablespoons of confectioners sugar, the zest of one large lemon and half of its juice. Mix it together, on the lowest setting of your mixer, until the cream becomes firm. This took me about 5 minutes. Adjust any of these ingredients to your liking! Serve with berries.


On a less-related note, I have to share this picture. Meredith claimed in her Maid of Honor speech at my wedding that when we were little and played dress-up, I was always the bride and always made her be the boy. Well, my mom recently found this photo, and it is undeniable proof that there were indeed times in my childhood when I relinquished the coveted bride role to my bestest pal. Mere, you can never accuse me of such atrocities again :)

I was in Tyler this weekend for my little brother's high school graduation (Congrats, Joseph!). We went out to breakfast at this super cool cafe where they serve all their food on these incredibly beautiful dishes. I am obsessed. Aren't they so cool???


And this really has absolutely nothing to do with this food blog AT ALL... but above is a picture of how I have been spending my time since receiving my Masters in Social Work. Painting. Yes. It makes me happy. Now Anthony gets to endure this super girly door in our new guest bedroom.

Monday, May 16, 2011

baked leek, potato, and parmesan frittata

I made this amazing egg casserole (let's face it- that's all frittatas really are) for one of my besties here in Columbus to help her out when her family came in to celebrate her husband's graduation from pilot training.  Hosting a lot of people is A LOT OF WORK, and being their tour guide on top of that just makes for an overwhelming weekend.  So, we agreed (her idea- she's a genius) to help each other out and make each other's breakfast dishes for when our families are in town so each of us wouldn't have to worry about it- did that make any sense? Basically I made breakfast for her family, and she's making it for mine when they're all here in about a month.  Well, along with Pioneer Woman's blueberry muffins with yogurt sauce and yogurt and granola parfaits with fresh strawberries, I made this frittata.  It was the first time I had ever made it and apparently it was a success :)  Those of you who ever need to feed about 10-12 people for breakfast, this is for you, ALTHOUGH, it is GREAT for lunch or dinner with a great salad. 

Ingredients
  • extra virgin olive oil
  • 1 cup water
  • 4 leeks (I couldn't find any so I just used a large yellow onion), white and pale green parts only, sliced into rounds then rinsed WELL
  • 3-4 garlic cloves
  • 1 pound yukon gold potatoes, peeled (I didn't) and cut into 1/2 inch cubes
  • coarse salt
  • 8 large eggs plus 2 large egg whites
  • 1/4 teaspoon cayenne pepper
  • 3/4 cup part skim ricotta cheese, drained (mine hardly drained- depends on the brand I think)
  • 1/3 cup (or however much you want!) grated parmesan cheese
Directions
  • preheat oven to 375.  Spray a 9x13 (I used a tad bigger pan I think) with cooking spray.
  • Bring water to a simmer in a medium/large skillet over high heat.
  • Add leeks (or chopped onion), garlic, and potatoes and season with a healthy pinch of salt
  • reduce heat to medium low and cook, COVERED, until potatoes are tender, about 8-10 minutes (mine took longer- just check on them- you want them just fork tender- don't let them cook too long or they won't hold up well in the casserole)
  • drain and let them cool
  • whisk together eggs, egg whites, 1/2 teaspoon salt and cayenne
  • fold in cooled potato mixture and the ricotta
  • mix in 1/4 cup parmesan cheese
  • pour mixture into dish and sprinkle with remaining parm
  • bake until edges are set, about 12 minutes, then reduce temp to 325 and bake until set and a knife inserted in the center comes out clean, about 20-25 more minutes.
*frittata can be refrigerated for up to 2 days

I believe this recipe came from either Real Simple or Martha Stewart

Wednesday, May 11, 2011

tricia mama's texas sheet cake


no, that's not supposed to be "tricia's mama's texas sheet cake"- it's what some young children call her- "tricia mama."  and it's my mommy. and she has THE BEST chocolate sheet cake recipe EVER.  whether you're PMSing or not, you NEED this cake in your life. I mean, to be honest, it's the perfect PMS cake (sorry to be honest but come on, we're mostly ladies here) but it's also a great cake when you need a dessert to feed 10+ people.  This is the kind of cake you want at 2 am when you just NEED something delicious and chocolate.  It will beckon to you from the kitchen.  Grab you a glass of milk (you'll need it) and make this cake. It's super easy and SUPER delish.

Ingredients
  • 2 cups flour
  • 2 cups sugar
  • 2 sticks butter
  • 4 tablespoons cocoa powder
  • 1 cup water
  • 1/2 cup buttermilk
  • 2 eggs slightly beaten
  • 1 teaspoon baking soda
  • 1 teaspoon vanilla
  • 1 teaspoon cinnamon
  • 1 stick butter (for frosting)
  • 4 tablespoons cocoa (frosting)
  • 6 tablespoons milk (frosting)
  • 1 teaspoon vanilla (frosting)
  • 1 box powdered sugar
Directions


  •  in a large bowl, combine the 2 cups of sugar and 2 cups of flour
  • in a pot on medium heat, combine 2 sticks of butter, 4 tablespoons cocoa powder, and 1 cup of water
  • bring this to a rapid boil then pour over flour and sugar and stir with a spoon until well mixed (don't over mix your cake batter- it will be tough, and you'll know what tough means if you taste it that way)
  • to the mix, add 1/2 cup buttermilk, 2 slightly beaten eggs, 1 teaspoon soda, 1 teaspoon vanilla, 1 teaspoon cinnamon.  
  • mix and pour into a well greased and floured 9x13 or whatever ya got at 400 degrees for 20 minutes
  • for frosting: melt and bring to a boil 1 stick of butter,  4 tablespoons of cocoa, and 6 tablespoons of milk
  • remove from heat and transfer it to a large bowl.  add 1 box of powdered sugar and beat all together
  • add your teaspoon of vanilla then mix again until combined
  • mer mer's trick: when the cake is done, poke holes in it using a fork, tooth pick, skewer, whatever you have
  • while the cake is still hot (whether you poke holes in it or not), pour icing over it.  spread the icing out evenly and leave the cakes alone until you need them
  • (after the icing and cake cools, cover your cakes)
now off to finish my caramel sauce- i'm making pioneer woman's "knock you naked brownies" currently.  i'll let you know how they turn out.

love love,

mere

Tuesday, May 10, 2011

Man Sandwich


So this is my third post in three days....


I've been out of school for about a week and am starting to feel a little bored. Can you tell? I just don't know what to do with all this free time!


Also, I've been on the Daniel Fast with a friend of mine. For those of you who aren't familiar with it, the Daniel Fast is kind of a detox/cleanse/spiritual focusing that follows the diet of Daniel in the Bible. It's one of those mind-body-spirit kind of things. Go ahead, call me a hippie. It's fine. On the fast, I drink only water and eat only food that grows from a seed.


So basically I've been eating rabbit food. And living vicariously through my husband for whom I have been cooking extravagently delicious meals filled with all the things that I can't eat on the fast. This was the ultimate man sandwich .


It's pretty simple: layer cheese, egg, bacon, more cheese, more egg, and more bacon, between two pieces of toast. I ate it with my eyes.

Monday, May 9, 2011

Make Your Own Stock!

I have discovered this incredible money-saving tip that also happens to amp up the health value of your food. Any time a recipe calls for chicken stock (or vegetable stock, or beef stock, etc...) I have been buying the kind that comes in a box. The kind that looks like this:Now, it's not really all that expensive...$3 or $4 maybe...but if you're buying it every time you go to the grocery store, it can really add up. In order to avoid this extra cost, I've started saving every little bit of vegetable that I normally would discard and instead keep it in a large ziploc bag and stash it in the freezer. If I'm chopping up an onion, I save the two ends that I normally would throw away. Chopping fresh herbs? Don't throw away the stems! Put them in your freezer bag. The peel of a carrot, ends of a zucchini, the fronds of a fennel bulb, the woody stems of broccoli and asparagus... all of this has tons of flavor and will add unique dimension to your homemade stock. I literally save EVERYTHING... which, now that I think about it, reduces waste and thus helps out Mother Earth a little bit, too.


After days or weeks of saving, your ziplock bag will be full. Once it is, you're ready for the next step. Before we move on, though, let me say a few things:

1. Don't be afraid if you have a crazy concoction of incredients in your bag. I have had jalepenos, parsley stems, sweet potato, and lemon all together and it turned out lovely. This is pretty fool-proof... I don't think any combination will result in a stock that is not delectable.


2. I have found that the "secret ingredient" that always takes my stock to another level is LEMON. Oh my goodness. It adds so much life to the stock.


3. You can automatically transform your vegetable stock into chicken stock by adding some leftover chicken bones. Same thing goes for shrimp shells, fish bones, or beef or pork bones. All of a sudden, you have gourmet shrimp stock or fish stock. And I mean, really, who ever finds that in the grocery store?


Alright, so you have your bag of frozen vegetable misfits.Put it in a pot, fill it with water, give it a healthy pinch of salt, and bring it to a boil. (Health benefit: you get to control the amount of sodium that is in your stock!) This may take a while since you are de-thawing your veggies. Once at a boil, reduce the heat and let the mixture simmer away on the stove top for at least an hour. The longer you simmer it, the more concentrated your flavor will be.


After it's done simmering, let it cool a bit and then strain it into a bowl.


Important note here: Let your stock cool!!! Last time I did this I had the most beautiful, rich, delicious stock, and I was so anxious to poor it into a plastic container and store it that I didn't let it cool completely. I poured it in and it was still so hot that it MELTED my plastic container and all that beautiful stock spilled all over the counter. I was so sad. Look at that beautiful rich color! Now tell me, have you ever bought stock from a box that looked like that? Let's sit for a minute and think about the wealth of opportunity that has just been opened to us. Any time a recipe calls for water, you can subsitute stock to give it an extra boost of flavor. Rice, couscous, risotto, pasta, cooked greens, soups... the possibilities are endless.


If you are going to use it in the next two weeks or so, go ahead and store it in the fridge. It can also be stored in the freezer for up to a year, but let me tell you, it is a pain in the a** to defrost.

Sunday, May 8, 2011

Carnitas Update

Hello all!

Kate here. I am so glad that Meredith posted the carnitas recipe! (See below). This is something we made when I went to visit her over spring break and I FELL IN LOVE with them. Of course, tacos of any kind make me melt into a warm puddle of happiness. When I came home from seeing her I immediately made them the next day for some friends that came over for Sunday lunch. I really don't have too much to add to her wonderful recipe... but I did take some lovely pictures that I would like to share with you all to further illustrate this kind-of-intense-but-totally-worth-it cooking process. Well, ok, let's be honest, I took the pictures and I just want to show them to you :)


When I made the carnitas I added a "pasilla" chili, per Bobby Flay's suggestion. It adds some smokey flavor and a little heat. Also, I added several thai chilis (not pictured) to crank up the heat.


This is what the meat should look like after you sear it. Nice and brown. Huge hunk of meat, huh? It was a little intimidating for a semi-vegetarian like myself...
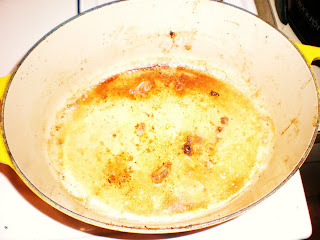


These are all the juicy little brown bits left on the bottom of the pan that you are going to scrape up when you de-glaze it with your blender concoction.


This is the meat sitting in it's delicious little hot tub. It's happy in there.


After 12-16 hours, the bone literally comes right out. The meat has completely melted off.


I served it with simple garnishes: corn tortillas, lime wedges, avocado, and cilantro.


Here's a close up of the little beauties.


Oh, also, I didn't have time to make a fancy drink. So I served ice water and "clementine" water. It was a hit.


Note: I put some pretty crazy things in these tacos that I thought gave it so much depth of flavor. Explore with what is in your pantry! I put in peanuts, cacao powder, COFFEE, cinnoman, several kinds of chilis, and lots of honey and apple cider vinegar until I achieved the perfect balance of sweet and smokey.


Ok that's all! Thanks for indulging me! See Meredith's post below for the full recipe.

Saturday, May 7, 2011

cinco de mayo carnitas + garnishes

 
I accidentally made these carnitas on Cinco de Mayo.  It's true- I didn't even realize that Cinco de Mayo was upon us when I planned to make them.  Here's the deal: I've got 12 people coming into town for Scott's graduation from pilot training in a mere 5 weeks, and I don't want to serve something to a bunch of people that I've never made before (unless it's at supper club) so my intention was to try this new recipe for carntias out and it just so happened that I tried it out on the same day as Cinco de Mayo (I know, I know, I must REALLY be a Latina!! my heart's desires have come true!!)  They were excellent.  I've been searching for the perfect carnitas recipes, so I'm trying out a few.  This one is Bobby Flay's plus a few twists of mine- I'll let you know my twists by using the word "optional."  Carnitas (or pulled pork tacos) are a real labor of love.  However, they're fool proof because you can throw everything but the kitchen sink in there (trust me, Kate and I have done it before) and they still turn out delicious.  Fix them to meet your taste buds along the way.


Ingredients for Carnitas- don't be intimidated by the amount!

  • pork shoulder (3 lbs or so, unless you're feeding 12 people in which case I'd say 5 1/2 lbs)
  • 1/4 cup canola oil
  • 3 cups chicken stock
  • 2 dried ancho chili peppers, stemmed and de-seeded
  • 2 dried new mexico chile peppers, " "
  • 4 dried cascabel chile peppers, " "
  • ***I couldn't find cascabel chiles so I just upped the amount of new mexico and ancho chiles. they come in big bags (dried) at wal mart or latin markets...I obviously had to use wal mart
  • 1 large yellow onion, roughly chopped
  • 6 cloves garlic, smashed
  • 1 cup dry red wine
  • 1 cinnamon stick (optional)
  • 2 bay leaves (optional)
  • oregano (optional but necessary)
  • 1-2 chiles in adobo (optional)
  • apple cider vinegar (optional but necessary)
  • can of whole tomatoes (didn't use it this time but I will in the future)
  • tomato paste (see above parenthesis)
  • 1/2 cup port (I didn't have this so I just used red wine)
  • 12 sprigs of thyme
  • tortillas (note: I dampen a kitchen towel and wrap the tortillas in it and microwave it for around a minute and they're perfect)
  • cilantro, limes, cabbage slaw, pickled red onions, guac. for garnish (recipes for guac, pickled red onions, and slaw below)
Directions for Carnitas
  • get your slow cooker ready on the LOW setting
  • pat your meat dry and season it liberally with salt and pepper- I'd also encourage you to add cumin to this process
  • in large sautee pan, heat your oil and get it to smoke
  • once it starts smoking, add your meat and sear on all sides (remember what we've talked about with searing- if it doesn't lift up easily, it's not done searing- you want your meat BROWN on the outside)
  • when it's seared, stick it in the slow cooker
  • meanwhile, put all your dried chiles in a pot and fill it with your chicken stock, turn the pot onto medium heat and bring to a simmer
  • once it's at a simmer, remove it from the heat to allow it to steep for 15 minutes
  • in the same pan you just seared your meat in, add your onions, garlic, cinnamon stick, and bay leaves (and tomato paste if using) and a good pinch of salt (put pan on medium-high heat)
  • stir around until the onions are fragrant and translucent.  
  • now add your red wine and chile stock (take your chiles out so you can de-seed them, dont worry about chopping them) with the 12 sprigs of thyme (this would also be the time to add your tomatoes and chile in adobo, if using)
  • let this simmer and go de-seed the chiles- add them to the mix when you're done
  • in batches, pour your stock mixture goodness into a blender to blend everything together (hold your blender down with a towel and apply pressure otherwise your lid will fly off because of the heat)
  • taste for seasonings.  at this point I wish I would have added a chile in adobo sauce but the commissary didn't have them so I didn't
  • add a few big dashes of oregano, some apple cider vinegar (maybe 1/3-1/4 cup)
  • did I forget anything?  just dump it all together and blend it together- that's the point.  
  • dump this sauce over the pork in the slow cooker and let it do its' thing for around 12 hours (at least 10).  every so often you can check for flavorings, though.
the good news is, you really can't mess it up.  if you want more heat, add some chili powder, or use more chiles, or use some jalapenos.  it's so versatile- the good news is, whatever you do, thanks to the slow cooker, your meat will be so tender! now onto garnishes


Pickled Red Onions
  • 1 large onion, finely sliced
  • 1/4 cup red wine vinegar
  • 1 tablespoon honey
  • 2 tablespoons olive oil
  • 1 tablespoon finely chopped cilantro (don't have to have this)
  • Salt and pepper
Cabbage Slaw
  • 1/4 cup lemon juice
  • 1/4 cup orange juice
  • 2 tablespoons dijon
  • 2 tablespoons clover honey
  • cilantro (as much as ya want)
  • Salt and freshly ground black pepper
  • 1/2 cup canola oil
  • 2 cups finely shredded napa cabbage
  • 2 cups finely shredded red cabbage
  • 1 large carrot, peeled and julienned
*I just used a bag of angel hair slaw (double the bags for this recipe)- but make sure to NOT overdress your slaw! you want CRUNCH! I made this mistake, and it was still yummy, but I was wanting more crunch.  note to self for next time.

Mere's guacamole

everyone has their own delicious recipe for guac, and everyone's is different, but here's mine:

  • 3 ripe avocadoes
  • 1 bunch of cilantro, chopped
  • 3 limes
  • salt
  • purple onions, chopped finely and soaked in ice water for about 10 minutes (it gets rid of the bite of red onions- promise!)
  • 2 large cloves garlic, minced
  • tomatoes (optional- I don't normally use them)
once you've cut open the avocados and get the seed out, spoon out the inside into a bowl and mash with a fork.  drain your onions from their ice water and add them with the garlic, cilantro, tomatoes (if using) and give it a GOOD pinch of salt.  stir to combine.  now start addin' that lime juice!  at this point, it's up to your taste buds- taste as you go for more salt or lime and enjoy!!

Add all of this to your tacos, fold up, and enjoy!!

Tuesday, May 3, 2011

Sweet Potato Wedges: Elevated Southern Cuisine


Once upon a time I called Meredith to ask her how she makes her sweet potato wedges. Let me re-iterate: this is her recipe, not mine! But she insisted that I post it and, since I have a great picture of them anyway, I will succumb to the demands of my adoring public :)

One sweet potato will make enough fries/wedges/whatever for one person... so if you're making them for five people, use five potatoes. Two people, two potatoes, etc... Entiendes? Bueno.

This is the simplest recipe of your life. And the most delicious. And super healthy (because sweet potatoes are so nutritious!). And super cheap (because sweet potatoes are something like $0.50/lb right now!).

Ingredients:

- 2 sweet potatoes (for two people)

- Olive oil

- Chili powder

- Ground cumin

- Kosher salt and freshly ground black pepper

- Italian flat leaf parsely, chopped

- Yep, that's all. Nothing else.

Directions:

- Preheat the oven to 400 degrees and position a rack close to the top. We're going to get these little guys nice and hot and crispy.

- Cut up your sweet potato. I wish I could tell you how I did it but, truth be told, I'm a little erratic with a knife. There is no rhyme or reason to my cutting skills. All I know is that I cut the potatoes' "little hiney off" like Meredith instructed me to. Then somehow I cut them to look like what you see above. You'll figure it out. I have faith.

- Take a large baking sheet and line it with parchment paper. I do this to help my sweet hubby with some of the clean up. I know I know. I'm so thoughtuful. Put your potatoes on there, drizzle some olive oil over it, sprinkle them generously with salt, pepper, chili powder, and cumin. Mix it all around.

- Bake for about 30 minutes, stirring them once half-way though. Keep an eye on these beauties to make sure they don't over cook. We want them nice and roasted and crispy, but not burned.

- Sprinkle the parsely over them to give the elegant, fancy-pants effect you see above.


It's so good, y'all. The cumin, chili powder, and parsely really gives it a little something different than the typical sweet potato fries all you good Southern lads and lassies are used to. In fact, I'm going to make them again tomorrow night!

announcement to kate

PLEASE POST YOUR SWEET POTATO WEDGES!!!!! I speak for everyone who reads this blog when I say WE WANNA SEE 'EM!!!!!

Sunday, May 1, 2011

Real Food.


This weekend I played in a charity tennis tournament supporting Spaulding for Children, the foster care and adoption agency that I have been interning with this year. (It’s an amazing organization! Click here for the link). In between matches I had a conversation with a girl who is as much of a health nut as I am. She was telling me all about how she has changed her diet and is now eating only “real food”… fresh, local ingredients without any preservatives or artificial crap. Whole grains, fruits, veggies, etc. etc…. Well, I was a little inspired, and tucked this conversation away in my mind until after I finished playing the 120 tennis games over the course of two days. Let me just say, I can’t move my body. Every muscle I have hurts. It’s that weird kind of pain though… the kind that actually feels good.

I’m so excited to have rediscovered tennis and can’t wait to keep playing and actually exercising for once in my life. When I came home today, I was all excited about jump-starting my new health and exercise regiment, so I went to Kroger and bought some veggies… but not just any vegetables, mind you! I bought a jumbo sweet onion, baby portabella mushrooms, and one bunch of fresh spinach: all things that Anthony hates. He eats dinner with his youth group on Sunday nights and hey, I have to take advantage of the situation and cook them when I can :) I sautéed these beautiful ingredients in some olive oil, balsamic vinegar, salt and pepper, starting with the onion until it was nice and soft, then adding the mushrooms until they were cooked through, and finally adding the spinach right at the end so it just barely wilted. Isn’t that a lovely picture?

Now was this meal fresh and delicious and did it make me feel good about my dietary choices? Yes. Was it very difficult to make? No. Was it so incredibly simple that you could you have thought of it on your own without reading this blog? Yes, but I like sharing my life with you through the food I eat, so I put it on here anyway.

Did I swiftly ruin my good dietary choices by eating three cookies afterwards? Uhh… yeah… maybe.