Wednesday, June 29, 2011

Middle Eastern (-ish) Beef Stew

When my husband asked me what was for dinner, I simply answered “Beef Stew”… slyly leaving off the “Middle Eastern” qualifier. You see, my sweet wonderful husband thinks that he doesn’t like certain exotic flavors, and I didn’t want him to run and hide before he had even tried the meal. However, he knows that he likes anything that involves red meat… and when you describe the dish as a “stew” it just sounds that much more manly. It was delicious and we both loved it. Stay tuned for more lessons from Kate about how to get a man to eat what you want him to :)

Anthony and I were both gone Monday night, so I made this stew in my trusty slow-cooker so that it would be ready when we got home. Slow cookers are wondrous things. Last week I used it to make the infamous Sweet Potato and Black Bean Chili that Meredith and I are both obsessed with. The slow, even cooking of the crock pot deepens the flavor of soups and stews and gives the ingredients plenty of time to “marry”… or come together and blend.

This is really more of a cross-cultural dish with some Middle Eastern spices rather than purely Middle Eastern. You’ll see when you read some of the crazy ingredients I included. It would have been more authentic if I had used lamb but it was just so darn expensive! So I opted for beef. (Somebody make this and use lamb and tell me how it turns out!) This recipe is my version of one from, you guessed it, eatingwell.com. To see the original, click here. It didn’t get awesome reviews so I made a lot of changes and did my own thing and voila, it turned out beautifully.

Note: I’m really bad at following recipes and using exact measurements… which I imagine frustrates some of my more careful and precise readers when they try to follow my directions. Sorry. All I can say to you is:

Trust yourself!

Experiment!

Let go!

And if that doesn’t work, just stick with Meredith’s recipes and ignore my erratic, rambling posts.

Ingredients:

-1 ½ lbs of “bottom round” beef (or lamb shoulder) cut into one inch cubes and trimmed of fat

-28 ounces of crushed tomatoes (I use “Cento” because they’re high quality and taste good and because thir commercials are so dorky but yet so cute… I tend to fall victim to clever marketing schemes.)

-1 bunch of fresh spinach (I use this instead of the packaged baby spinach because I think it tastes just as good and it’s significantly cheaper)

-14 ounces (1 can) of organic garbanzo beans (chickpeas! My fave.)

-1 small yellow onion, diced (cut into little squares)

-1 bunch of leeks, sliced and cleaned. We’ll discuss this later.

-1 large lemon

-2 heaping tablespoons of olive tapenade… just because I had it in my fridge and I wanted to.

-¾ a cup of homemade veggie stock… or whatever kind of stock you have. Beef or chicken stock would be delish.

-5 cloves of garlic, minced (that means you cut it up as small as you can!)

-About 5 teaspoons of ground cumin… maybe a little more.

-About 2 tablespoons of ground coriander… maybe a little less.

-About 2 tablespoons of ground turmeric… you get the idea.

-¼ teaspoon of smoked chipotle chili powder (see I told ya… “cross-cultural”)

-Crushed red pepper to taste. We like it spiiicccyyy in my house.

-2 bay leaves

-1 cinnamon stick

-Extra Virgin Olive Oil

-Kosher Salt

-Freshly ground black pepper

Heaven help me. That is a lot of ingredients. I didn’t really realize that before now.

Directions:

1.Put your cubed meat into a large mixing bowl. Drizzle it with a little olive oil, just enough to coat. Sprinkle over it 4 teaspoons of cumin, 1 tablespoon of ground coriander, 1 tablespoon of the turmeric, the ¼ teaspoon of chipotle chili powder, and a couple of dashes of crushed red pepper, salt, and pepper. Mix it all together with clean hands until all the meat is fully coated. Cover the bowl with plastic wrap and put it in the fridge to marinate while you continue on. At least 30 minutes, but the longer the better!

2.Dice your onion, set it aside. Slice and clean your leeks. Have we talked about this before? Leeks are a vegetable in the onion family with a mild, lovely, unique flavor. Only use the white and the light green parts (save the rest for your stock!). Cut off the root and the dark green stems. Slice the remaining, edible part into thin discs and then put them in a bowl filled with water. Because leeks have lots of layers, they have lots of dirt in between those layers. By putting them in water, the dirt sinks to the bottom and the leeks float to the top, enabling you to scoop them out all nice and clean.

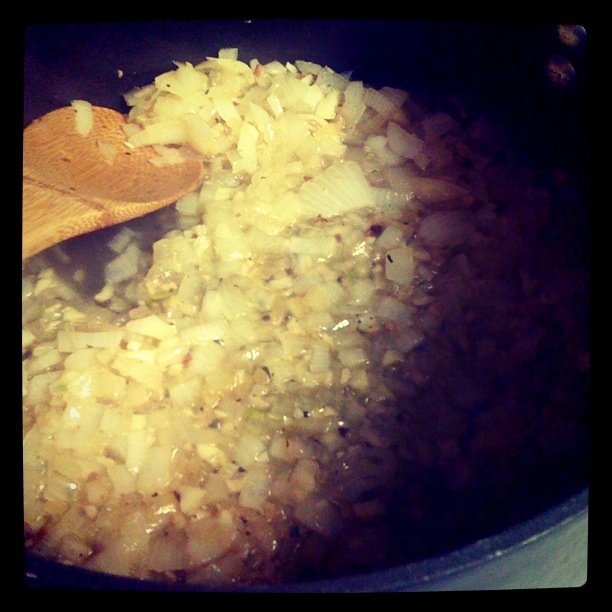
3.Dry off your leeks with a kitchen towel. Put them in a large sauté pan with the diced onion. Drizzle with a little olive oil and sprinkle with salt. Sauté over medium heat, stirring occasionally, until the onion and leek are ¾ of the way cooked. They should be soft and beginning to turn translucent. Add your minced garlic and cook for one more minute. Transfer them to your slow cooker and let them hang out (but don’t turn it on yet!)

4.In the same pan you just used, bring the tomatoes and broth to a simmer over medium high heat. Add some more of your spices: coriander, turmeric, cumin, salt and pepper. As much as you want. Stir it around. Pour it on top of the leeks in the slow cooker.

5.Add your meat. Add your olive tapenade. Add your bay leaves and cinnamon stick. Cover and cook until the beef is tender: either 3 ½ - 4 hours on high heat or 6 ½ - 7 hours on low.

And just before serving…

6.Drain and rinse all the yucky sodium off the chickpeas. Mash ½ of the peas with a mortal and pestle and add it to the stew. This will thicken it a bit. Throw in the remaining whole chickpeas, too.

7.Rinse off a couple of handfuls of your spinach, cut off the stems and add it to the stew. This is really a “to taste” kind of thing… put in as much as you like. Remember, spinach is full of vitamins! Let it fully wilt if you like it like that. Me, I prefer a half-wilted spinach leaf.

8.Squeeze in the juice of the lemon. This will lift the flavor of the stew to the realm of the angels and make you die of happiness.

I know that picture up there doesn’t look that appetizing. How do you make stew look pretty? I just don’t know. Trust me, though, it’s good. And now I believe that I can take the prize for the absolute longest recipe ever. If you actually read this far, bless your heart. You’re a good friend.

baked ziti

Simple and delightful, this dish is a quick and easy fix to the normal hum drum spaghetti and meatballs.  Ok who are we kidding I don't actually talk like that, I've been on Real Simple looking at home decoration ideas for way too long reading their little descriptions and that's how THEY talk. 

This dish is simple, though, and is made with a less complex marinara sauce than my other marinara sauce I used for my lasagna (posted a couple months back).  We'll call this sauce a tomato-basil pomodoro so it sounds fancy.  Baked Ziti is one of those dishes I never make but it's something so comforting and delicious- and filling- that I thought I'd take a stab at it.  Come to find out, it's just like making dadgom spaghetti and meat sauce but with a different type of pasta and thrown into the oven.  Why have I not been making this more often?  It was scrumptious.  Ok friends, here's the recipe (with lots of pictures this time!)

Ingredients:
  • 1 package of sweet italian sausage, with the sausage cut out of the casings (if that's new lingo for you, basically what I did is bought a package of the big sausage "links" and took a knife and cut down the middle and got all of the actual sausage out.  It's not a pretty job but ya gotta do it- or you could just slice the sausage instead of removing them from the casings)
  • 4-5 medium sized garlic cloves, chopped
  • 1 onion, diced
  • 1 28 oz. can crushed tomatoes
  • leftover red wine (or balsamic vinegar or red wine vinegar)
  • lots of beautiful basil- do not make this recipe if you don't have basil.  there's just no point.
  • 1 box penne pasta
  • 2 cups of your choice of mozzarella, parmesan, or a mix (I used a Sargento Italian blend)
Directions:
  •  cook your box of pasta until JUST UNDER al-dente.  Al-dente is when it has a bit of a "bite" to it, so it's not completely soft- you want a real "bite" to it- not just a little one, because the pasta continues baking in the liquid of the sauce in the oven and we don't want it to turn out mushy!
  • drain your pasta and place it aside
  •  get some olive oil and add just a quarter sized amount to the pot and turn it on medium-high heat. you won't need too much oil because the sausage has some fat in it that will help render it down
  • add your sausage that you have so kindly removed from the casings and break it up in the pan like so:
  • ok now you see all that juice left on the pot after you removed the sausage?  we won't call it grease or fat, we'll call it juice.  we're gonna use it to sautee our onions and garlic.  you heard me. use the juice!
  • add your onions and garlic and cook them down until they start looking translucent like the above photo
  • next add your sausage back to the pan:
  • cook it for a few more minutes, turn your pan to medium high, then give your pot a couple swigs of some leftover red (or white) wine you have laying around- our some red wine or balsamic vinegar
  • let that cook down for 2-3 minutes then add your can of crushed tomatoes, a big pinch of salt, and partially cover your pan like so:
  • let it cook for 15 minutes on medium-low heat then take the lid off and add 2-3 big bunches of gorgeous basil (mine was gorgeous, anyway.)  I didn't get pictures of this, but trust me, it was beautiful.
  • stir in your basil and smell the aromas (it might be a good idea to taste for salt levels and see what you need to add)
  • this was before the basil hit the pot, but still, mmmmm
  • alright so your basil is stirred around, now add that pasta you put aside
  •  taste for flavor- does it need anything?
  • spray a 9x13 and pour your pasta in it and cover with aluminum foil
  • bake at 375 for 15 minutes, then remove your foil, add your cheese (pretty much the entire bag) and let it bake for 5-10 more minutes
ohhhh yeahhh mama
  • enjoy!!


Monday, June 27, 2011

I'm baacccckkkkk!

and with a recipe for beer bread.  ho.ly. moly.  I thank God for my sweet friend Kristi and for her ability to make delicious food- this being one of my favs that she makes.  I made the sweet potato chili (see the post from March- I added cilantro and avocado and it was DELISH) and Kristi brought over beer bread for dinner.  We watch 24 with her and her husband and tonight we decided we'd include dinner.  I asked her if I could kindly get the recipe from her to post and she obliged!  It's very easy! Doesn't even need any yeast!!


Ingredients:
  • 3 cups flour (she has tried it with whole wheat and it was very dense so beware)
  • 3 teaspoons of baking powder
  • 1 teaspoon salt
  • 1/2 cup sugar
  • 1 bottle beer (12 oz I think is what they are)- any kind you want, you can even switch it up.  She has used a cherry beer before that made the bread deliciously sweet so go nuts!
  • 1/2 cup melted butter
Directions:
  • mix dry ingredients together in a mixing bowl
  • make a "well" (a hole in the middle, basically) 
  • pour the beer into the well and fold it in
  • the batter will be "goopy" as Kristi describes it- kinda chunky, too
  • DON'T OVER MIX! It will be tough
  • pour into a sprayed loaf pan 
  • melt the butter and pour over the top of the bread
  • bake at 375 for 50 minutes to 1 hour
  • leave in the pan for 15 minutes and then transfer to a wire rack to cool (it's delicious when it's eaten warm!)
ok I will be packing and moving over the course of the next week so I might drop off the face of the planet again! Hang with us readers! We really do love you and this blog!! Keep reading!

Sunday, June 26, 2011

Pistou Basil


 Poor little neglected food blog.

Meredith and I have been out of town intermittently these past few weeks and haven't been doing a great job of keeping up with our posts.

Sorry, readers!

Today I would like to tell you about a marvelous discovery I have made.

Pistou Basil.

Remember how once upon a time I made a disastrous attempt to grow basil? Remember how, after one harvest of leaves and a desperate attempt to bring it back to life by over-watering, it looked like this:


Well, after that disaster, I vowed never to grow basil again. I vowed to replace that traitorous herb with something more be-fitting of my shady plot of sand I call a garden.

But then I went to the PPK (the Pretty People Kroger... called such because it is located in a ritzy neighborhood full of rich, beautiful people). I was seduced by the shelves of exotic herbs enticing me with their unfamiliar names and the promise of new life. I couldn't help myself.

Instead of buying a cactus that surely could survive the treacheries of heat, inadequate sun, and the gusts of harsh air from our yard man's terrifically powerful leaf-blower, I bought "pistou basil", a delicate looking plant that Wikipedia calls a variety of the traditional basil plant characterized by smaller leaves and a milder flavor.

While I stood in line at the check-out counter, I was hoping and praying that if I planted it, all my dreams of being able to make bruchetta, marinara sauce, and pesto with my very own home-grown basil might not just be fantasy, they might not just be a distant dream... they might not be lost with the death of the Pistou's evil predecessor.

And I was right.

Look how beautiful that plant is! It has grown more vigorously than I possibly could have anticipated! In fact, it has outgrown it's original pot. Tomorrow I will buy it a big, beautiful, elaborately decorated pot in celebration of its ability to withstand all the hardships thrust upon it by this less-than-capable gardener.

People of the world, take heart! You, too, can grow pistou basil and be rid all the worry and anxiety caused by its traditional counterpart.

Tuesday, June 21, 2011

Make Your Own... Italian Breadcrumbs!

A couple of weeks ago Anthony and I made the familiar trek up to Tyler to drop our darling baby off at his grandparents' house.

I think he looks like me.


Because we were going out of town for a week, and because I hate to waste food, I decided use all the leftover bread in our refrigerator to make my mom a little homemade "thank you gift" for taking care of my darling dog. (I also tried to make her some homemade stock like I've posted about before, but I put lime in it and it was horrific. Note to self: do not use lime when making stock). Italian breadcrumbs are so easy and fun to make.


Start by picking an array of herbs from your garden (or supermarket). Here I have rosemary, thyme, oregano, and sage. Put them in a colander and give them a good rinse.


Chop up your herbs and set them aside.


Take your leftover bread and give it a whirl in the food processor until it's all broken up. This time I used plain ole' sandwich bread, but I have also used fancier varieties that produced a lovely result.


Put your bread in a large sauce pan and saute them over low-medium heat with a healthy drizzle of olive oil.


Add your herbs, a handful of grated Parmesan cheese, salt and pepper.


Stir and turn the breadcrumbs until they are all nice and toasty. You want them to be all the way crunchy... because that's how breadcrumbs are supposed to be. Let them get golden brown... to the point where they are almost burned.


Once you achieve that beautiful golden color, turn off the heat and let them cool. Put them in a leftover yogurt tub that you've rinsed out, tie a pretty ribbon around it, and take it to your momma and say THANK YOU!


Or just use them for your own purposes. I love to put breadcrumbs in pasta...


Atop macaroni and cheese...


Roast them with shrimp, lemon, and garlic....


And use them to coat olive-oil-soaked-zucchini and bake the in the oven to make "fried" zucchini. Oh! I think I have a picture of that!


Yes. Here it is. The breadcrumbs are featured in the roasted shrimp and roasted zucchini. Yum.

Saturday, June 18, 2011

The Health Benefits of Whole Grains

So the other day I tried to make lasagna for the first time.

Sigh.

It wasn't great.

I got home late and was really rushed because Anthony and I were soooo hungry. I didn't season properly, I didn't pay close attention to the recipe, I was scattered and crazy in the kitchen.

Whatever, it happens. To see my philosophy on not taking your time while cooking, see my March post entitled "Taking My Time..."

One thing I was happy about, though, is that I was able to find whole wheat lasagna noodles.

Have y'all discovered whole wheat pasta yet? It's great... I hardly notice any difference in taste and it has so many health benefits that regular pasta just doesn't bring to the table.

It seems to me that there is a food revolution going on in this country... a push towards being conscious of what we put in our bodies and how we take care of ourselves. Think about Michelle Obama's campaign against childhood obesity and Jamie Oliver's new T.V. show that seeks to improve school lunches. So much of what we eat these days is highly processed, full of preservatives, is stripped of nutrition, and does little for our bodies besides fill us up. Since I hate exercise and physical activity (I know I know.... I'm working on it), I at least try to make sure that what I put in my body is actually doing something good for me.

Do I sound preachy? Ok I'll stop now. Just let me relay what the Mayo Clinic (a highly respected institution) says about whole grains:

- Whole grains have more protein...

- More fiber....

- And more vitamins such as potassium and magnesium than refined grains.

- Because they are higher in fiber, they make you feel fuller, longer.

To see the whole article, click here.

You can get whole grain anything these days... sandwhich bread, hamburger buns, pasta, rice, crackers... it's wonderful. And, in my opinion, delicious.

Tuesday, June 14, 2011

mer mer's hummus

I recently made some delicious (garlicky) hummus that my friend Camille asked me to post- much to my joy.  So, I'm sorry for my lack of pictures, but I promise it's yummy!


Ingredients
  • 2 cloves garlic
  • juice of 1 large lemon
  • 1 bunch of parsley
  • 2 cans chickpeas, drained and rinsed
  • salt
  • olive oil
Directions
  • smash and peel the garlic and throw it in the food processor and give it a quick whirl to break it up
  • dump in your drained and rinsed cans of chickpeas, a heaping pinch of salt, your parsley, and lemon juice (and  a little zest if you like it super lemony like me)
  • start the food processor and drizzle olive oil into it until you get the consistency you want.  
  • try it for more salt and add as needed
  • serve with pita chips dusted with cumin
  • yum!

Latin American Street Food in Los Angeles

Hi Everyone!

I'm so sorry I haven't been posting lately. I have been on a mission trip in L.A. with my husband's youth group this past week and thus haven't been cooking! It was an incredible trip: I led a group of (the greatest) 8 kids around the city doing service work with the homeless population and at-risk kids. We all learned so much about ourselves and our place in the complex, broken, and beautiful world around us.

Another thing I learned about high school kids, especially high school boys, is that they are ALWAYS HUNGRY. I swear they ate nine times a day. So, in between mission sites, we were constantly on the look out for food. After a morning of particularly-challenging service where we cleaned out a woman's house whom I would professionally classify as a hoarder, we stopped for lunch at this taco truck for a taste of local flavor. We technically weren't supposed to take the kids out for food because they had sack lunches... but they had just worked really hard in a really challenging situation and I justified it by pointing out that we were supporting the local economy.
These were my "carnitas" that I got. It was Heaven on Earth. Since Meredith and I's Mexican adventure in 2008, I have never found tacos in the States that recaptured that authentic street food flavor that she and I walked a mile every day to get while in Galeana.

Another morning we went on a scavenger hunt throughout downtown L.A. with a list of goals to accomplish. We were given boundaries to stay within.... but my group was dead-set on tracking down the infamous Nom Nom truck from the Food Network so we might have wandered outside the boundaries a few blocks. Clearly I'm not very good at following rules. (St. Martin's Youth Staff, if you're reading, please invite me back next year! I promise I'm a good leader!) We didn't find the Nom Nom truck, but we did find this awesome farmer's market right on the steps of City Hall. This is me drinking a huge class of freshly squeezed watermelon juice from an El Salvadorian vendor. Que delicioso.


On one of the last days we stopped at this incredible Mexican market for lunch. Everything looked amazing, and there were so many new and interesting things that I wanted try... so I ended up buying a huge assortment of goodies... way more than any one person could ever eat.
Below is my plate that I had to have two kids help me carry around. On the far left is a cup of fresh mango doused in chili powder and fresh lime. Notice the little Mexican flag on the top. On the right is a fried plantain with brown sugar. It was all warm and gooey and scrumptious. Below is an interesting dish called "elote", or roasted corn topped with some queso fresco and lime. (Traditionally they put mayonnaise in it, too, but since that makes me want to gag I left it out).

Ok. Y'all are probably tired of reading. You can stop now. The rest of this post has nothing to do with food....


This is a picture of a little girl that attended the Vacation Bible School we put on every afternoon. She had a pet duck.... and I had a fit. It was the cutest sweetest most precious little thing I have ever seen. I am currently in the process of concocting the perfectly persuasive argument that will convince Anthony that we need a pet baby duck. This little girl claimed that her baby duck was potty-trained and that it was good friends with her dog. So, I think I could likewise potty-train our baby duck and it could be a good little friend to our pit-bull, Willie. That could work, right?


Let me explain my obsession. Once upon a time I had a pet baby goose named Evadne. She was the best pet in the world. She loved to be cuddled and she followed me around every where I went with her sweet little "peep peep peep". This is a picture of me swimming laps in the pool, with Evadne dutifully following behind her mama. We won't talk about why she is no longer with us unless you want to cry, but suffice it to say that the hole she left in my heart has never been filled and so I think I need a baby duck. I will name her Antigone.

Tuesday, June 7, 2011

mojito cake-tails


Oh boy, Oh  boy is this recipe delish.  This is a recipe I've had in my massive recipe binder for a couple of years and haven't gotten around to trying it yet (ie- I'm not taking any credit for this recipe- it's from a magazie I just don't know which one).  As many of you know, I have about 12 people coming into town to celebrate Scott's graduation from pilot training (love you, babe!).  In light of the latin-esque meal we will be having on Thursday night, I wanted to try a new recipe for dessert (I feel like no one ever knows what to do for dessert after eating something Latin inspired except flan) so I did a trial run on this recipe that I've been wanting to try FOREVER, these little beauties called "mojito cake-tails" (get it- instead of "cocktails?").  Mojitos are my absolute FAVORITE drink so I knew it'd be a hit.  I just tried one and WHOA are they yum. Here goes:

Ingredients:
  • 2 sticks (8 oz.) butter
  • 3 cups salted pretzels, finely crushed
  • 1 cup plus 6 tablespoons sugar
  • 2 8 oz packages of cream cheese, softened
  • zest of 3 limes, plus 1/2 cup lime juice (3 limes did the trick for the lime juice- just zest them before you cut them to juice them!)
  • 2 tablespoons white rum (optional)
  • 3 tablespoons of finely chopped fresh mint, plus sprigs for garnish (about 6 sprigs of mint- don't go light on the stuff, it makes a difference!)
  • 2 cups heavy creaam
Directions:
  • In a medium skillet, melt the butter over medium-low heat.  Stir on pretzels and 2 tablespoons of sugar and cook until lightly toasted, about 3 minutes.
  • Transfer to a bowl to cool slightly.  Press about 2 tablespoons into the bottom of each cup of a muffin pan and freeze for 30 minutes (I am just now seeing this part of the instructions....maybe that's why my pretzel crust didn't stick so well...oh well, it was still delectable.)
  • Meanwhile, using an electric mixer, beat the cream cheese on medium speed, scraping down the sides of the bowl, until fluffy, 2-3 minutes.  Mix in the remaining 1 1/4 cups sugar on low speed, then gradually mix in the lime zest, lime juice, and chopped mint
  • try your batter....just because.  it's so stinkin' good!
  • in a separate bowl, beat the heavy cream until stiff peaks form.
  • fold into the cream cheese mixture
  • divide the cream cheese mixtures evenly among the muffin cups, smooth the tops.
  • cover with plastic wrap and freeze for at least 8 hours or over night (woopsie...forgot to cover with plastic wrap!)
  • to serve, run a wet knife around each cake
so mine's not as pretty as the magazine's- who cares?

clearly, not me.

Sunday, June 5, 2011

healthy banana nut muffins that are ACTUALLY good

I konw I know, how could any kind of healthy muffins actually taste GOOD?  If you were anyone who has fallen victim to my attempt to make all kinds of healthy muffins, you'd say "it's not possible....especially if Meredith is making them."  I'm not kidding- I've devoted the last year to try and find healthy and yummy muffin recipes because you can make them ahead of time, freeze them, and eat them whenever you need breakfast on the go!  Needless to say, I've been defeated by this process many, many times, but FINALLY- thanks to my dear friend Kristi Kurzen for letting me borrow her Cooking Light cookbook, I have found the muffin my heart loves.  I mean ok, there's still sugar and a bit of butter, but if you want your healthy muffins to actually taste GOOD and be enjoyable, you need both of those ingredients, let's just face it- I've had to.  I had family coming in for our assignment night and I needed to make breakfast and I needed it to be good and healthy, so I took a risk in trying something new, but it paid off....it might have helped that I made cinnamon-honey butter to go with them, but who cares! So, onto DELICIOUS, moist, healthy muffins :)

disclaimer: I failed to take pics AGAIN- but I do have a picture of my breakfast table with all of the food on it (thanks to Sara for the poppies)


Ingredients:
  • 2 cups all purpose flour (I used 1 1/2 all purpose and 1/2 whole wheat)
  • 3/4 teaspoon baking soda
  • 1/2 teaspoon salt
  • 1 cup sugar (you could use part sugar part honey or agave nectar, or all sugar in the raw as opposed to refined sugar)
  • 1/4 cup butter, softened (Smart Balance has a blend you can bake with)
  • 2 large eggs at room temp (you can soak them in warm water for 10 minutes to speed this process up)
  • 1 1/2 cups mashed bananas (with brown spots and soft- none of this firm stuff); about 3 nanas
  • 1/3 cup vanilla yogurt (or you could use plain and add 1 teaspoon of vanilla)
  • cooking spray
Directions
  • preheat oven to 350
  • lightly spoon flour into dry measuring cups, level with a knife.  
  • Combine flour, baking soda, and salt, stirring with a whisk
  • place sugar and butter in a large bowl and beat with a mixer at medium speed until well blended (about 1 minute)
  • add eggs, one at a time, beating well after each addition.  add banana, yogurt, and vanilla (if using); beat until blended.
  • add flour mixture; beat at low speed until just moist
  • spray your muffin tins
  • using an ice cream scooper, fill your muffin tins (then add another little spoon full so you have decent sized muffins)
  • bake for about 25 minutes
Cinnamon Honey Butter
  • 1/2 stick butter, softened (I keep mine in my pantry- yes, it's ok)
  • a good couple swirls of honey
  • a few dashes of cinnamon
mix all together with a fork and try on a piece of toast until you get the flavor you want!

serve with the muffins!  DELISH!

Thursday, June 2, 2011

Bacalao: Puerto Rican Fish Stew


(I know this is a terrible picture... not the most appetizing... this was so delicious that I scarfed half my bowl before remembering to take a picture for y'all)

It’s the beginning of summer and the seafood is fresh and beautiful here in Houston. I stumbled upon this incredible recipe from eatingwell.com that immediately caught my attention… not because it is only 215 calories per serving, but because I already had most of the ingredients in my pantry (essential to cooking on a budget). Also, it is an authentic Puerto Rican dish and the Anthropology major in me loves anything with an obscure foreign name and Latin American origins. (Spanish speakers out there, how do you think you pronounce that? “Bacalao”. It means dry, salted codfish… but this recipe uses fresh fish instead.) Mere, I think you would especially love this since y’all lived in Puerto Rico for a little while. I went to visit them for a week and, while Meredith handed out towels to the tourists at the elegant Hilton Hotel, I lay in a hammock and contemplated the beautiful country with vibrant culture and interesting food… and the new boy I had just met who, a year later, would become my husband. Don’t you wish that we could all just forget the real world and travel around and lie in hammocks and eat things called “Bacalao” all the time? But, alas, we shall just have to pretend and bring Puerto Rico to us by recreating its food in our own little kitchens.

Oh, what? You wish you could see Meredith handing out towels to tourists at the elegant Hilton Hotel? Well, lucky for you, I happened to take a picture.

love the outfit :)

I’m going to give you my version of the recipe because I made some changes. If you want the original EatingWell recipe, click here. This makes 4 small servings, so adjust the quantities as needed. Serve with warm, crusty, whole grain bread to sop up all the juices.

Ingredients:

-2 tablespoons of Extra Virgin Olive Oil

-2 large shallots, minced

-4 cloves of garlic, minced

-1 lb of tilapia (or any other white fish that looks good that day), cut into ½ inch pieces

- 2 cups of Meredith’s homemade marinara sauce (I’m still obsessed with it. It’s full of flavor. Find her recipe under her March post entitled “Lasagna”)

- ½ cup of homemade vegetable stock (see my May post “Make Your Own Stock”)… of course you can use whatever kind of stock you have on hand.

-1 Anaheim chili pepper, diced (substitute a poblano chili or maybe even 2 jalapeños). Beware, the Anaheim chili has a good hot kick. My fingers are still burning from where I touched it raw. I love it, though. It makes me feel like I am sharing in some ancient experience of Latina women who cook traditional meals for their families in beautiful clay pots in hot, fragrant kitchens.

- ¼ cup of chopped cilantro. My favorite herb.

- 2 tablespoons of diced olives… whatever kind you have.

-1 tablespoon of capers

-1 teaspoon of oregano

-1/2 teaspoon of salt

-2-3 small avocados, diced

Directions:

1.Heat the olive oil in a Dutch oven over medium heat. Sautee your diced shallots with a pinch of salt until they are tender and translucent. Add your minced garlic and cook, stirring frequently, for about one minute.

2.Add the marinara sauce, vegetable stock, fish, Anaheim chili, olives, capers, oregano, and salt. Stir all together. Reduce the heat to low and cover the pot. Simmer for 20 minutes.

3.Garnish with the cilantro and avocado. Serve it hot.

4.Enjoy the compliments from your guests about how you transported them to a tropical island by serving this delicious, unique meal.