Hi friends. Wanted to share with you all some food things this week that may be old news to some of you, but they were a revelation to me.
1) add feta to rice pilaf to spruce it up (my friend Kristi, aka my roommate, taught me this the other night and it's so easy and delicious. I don't know why I've never done it before. She used a quick cooking rice pilaf mix and it was DELISH.)
2) along the rice train, add feta (or blue cheese or goat cheese...mmm!) to hot orzo with some fresh herbs for ANOTHER way to dress up orzo/rice. The best part? You don't have to re-heat it the next day because orzo is great cold. Add a squeeze of lemon and a drizzle of olive oil for a little boost for next-day leftovers.
3) nutella hot chocolate. yes. I'm serious. I have had 2 previous attempts at making hot chocolate here at the Mayo/Kurzen household (some of our best friends are staying with us for a couple months) and both attempts were not well received by the others. So, I read on Pinterest (Naturally. Can I have an independent thought anymore?) about stirring a big tablespoon of nutella into hot milk to make this delightful creation and DELIGHTFUL IT WAS. oh my goodness it was sensational. And easy. And better than any powder mix you can buy.
Ok, I'm sure most of you have been adding cheese to rice and thought to stir nutella into hot milk for a long time now, but for me, these were just incredible new bits of food knowledge. Hope you try these things if you haven't before!
Friday, December 16, 2011
Tuesday, December 13, 2011
Olive Oil Cake with Blueberries and Mascarpone

Serves 6
For the cake:
- 3/4 cup extra-virgin olive oil, plus extra for brushing
- 5 large eggs separated, plus 2 additional whites
- 3/4 cups sugar
- 1 meyer lemon, zested (I used an orange and a regular lemon to achieve the sweet 'meyer' lemon flavor)
- 1/2 cup sweet sherry
- 1 cup all-purpose flour
- Pinch salt
For the topping:
- 1 pint blueberries
- 1 lemon, zested
- 1/2 cup sugar
- 1 cinnamon stick
- 1/4 cup water
- 1 pint mascarpone
Preheat oven to 350 degrees F.
Line the bottom of a springform pan with parchment paper, and brush the sides with oil. (you have to cut the parchment paper to fit the circular shape of the springform pan- if you're not sure what a spring form is, it's the same kind of pan you use to bake cheesecakes)

separate your egg yolks and whites

'zest' is the skin off of the orange/lemon. If you don't have a zester, you can use the small side of the grater (not the smallest because the zest will just get stuck)
Beat your egg yolks, sugar, and zest on medium until they have turned very pale and become thick and have doubled in size- like so:

ok you can't tell they've doubled, but I had been beating them for upwards of 8 minutes at this point. It did the job.


here's what your batter will look like

you see how they are getting thick and foamy?

when you can take a utensil and remove some of the egg whites without the egg whites remaining attached to the rest of the egg whites, your peaks are stiff (think of it like when mozzarella cheese stays attached to your fork and plate when you're eating pasta- you DON'T want that affect with egg whites. They must be stiff and firm. You pickin up what I'm puttin down?)
Now that you've beaten your egg whites, you're going to fold them (in 1/3 increments) into the batter.

ok here's the first third. 'Folding' basically means that you are going to incorporate the egg whites from the bottom up, if you will. So, put your spatula in the middle of that egg white mixture to break it up, then, as if you are in you're high school color guard with a ribbon in your hand, guide that egg white mixture to the bottom of the pan to coat it with batter, then in a circular motion, bring it back up (Ok, this probably isn't making any sense. Melissa and C-Anne, if you're reading this and want to learn how to make this cake, you might need to just YouTube how to fold). Moving on. I'm confusing myself.
Alrighty, once your egg whites are fully incorporated in, pour the batter into your prepared spring form pan and bake at 350 for 45 minutes. I thought mine looked a touch brown on top, but it ended up being perfectly fine. Let the cake cool for 10 minutes, then remove the pan's sides and let it cool completely. Now let's get to this magnificently delicious blueberry topping (which, I might add, can be used as pancake syrup or you could use raspberries instead to use in a chocolate cake...oh the options!)
Topping:
Combine the blueberries, lemon (or orange) zest, sugar, cinnamon stick, and water in a saucepan. Bring this mixture to a medium simmer and let it cook/reduce/thicken up (all that good stuff) for 20-30 minutes. If you're blueberries aren't bursting naturally, you can use a masher or a fork to do the job. remove the cinnamon stick and let it cool. I would have pics of this if I had been thinking clearly that day, but since I wasn't and I don't have pics, you'll have to take my word that THIS.SAUCE.IS.DE.LIC.OUS. legit. SO yum.
This is where it would be phenomenal to have a picture of the finished product, but again, I was a slacker, so picture this: a piece of moist, golden, light and airy cake sliced, topped with a ladle full of that sweet, yet not- too-rich blueberry compote and all balanced out with the creaminess of a dollop of mascarpone cheese. Now doesn't that sound heavenly? Especially when you are craving a little morsel of goodness but don't need a rich chocolate cake to satisfy that sweet tooth? Thought so.
Sunday, December 11, 2011
Roasted Brussel Sprouts: Fear Not!

People. Have we talked about this?
Sometimes I forget what I share with you and what I just think about sharing with you.
Brussel spouts. I know you think you hate them. Apparently it's like the cool thing to hate brussel sprouts or something. Stop it. Stop it now.
When December roles around I go into seasonal vegetable depression. During the fall I freak out and obsess over autumn vegetables. From September to November I make squash soups and pumpkin breads and root vegetable purees. Following the Thanksgiving cooking frenzy full of such things, though, I come down with a terrible case of flavor fatigue. In times like this I can't stand to look at one more dad-gum acorn squash. No more! I can't eat any more squash! I miss the fresh, bright flavors of spring and summer. My body tells me that it has had its fill of beta-carotene and demands something GREEN.
Enter the pariah brussel spout. It's green, it's in season during the winter, and it has a unique flavor that offers some solace from all the worn out fall veggies. Alex Guarnaschelli (Food Network star and hopeful Iron Chef-to-be) says that if you have had a brussel sprout and hated it, then you had a brussel spout that was cooked incorrectly. When boiled, these little morsels of delight come out bitter, ugly, and, well, not so delightful.
But when roasted, they become crunchy, flavorful, and some-what sweet with a rich, meaty texture.
Making them is as easy as pie, too. (By the way...where did that saying come from? Pie is NOT easy.)
Pre-heat your oven to 400 degrees. Wash and trim your brussel spouts. Cut them in half. Put them on a baking sheet. Drizzle them with olive oil. Sprinkle them with salt and pepper. (Add shallots and garlic if you're feeling fancy). Roast the little babies for 20-30 minutes until golden brown. When they are just on the brink of being burned, but aren't quite burned yet... they are done.
Save yourself from a sad winter existence and re-try the brussel sprout. Just because it has a bad rap doesn't mean that it actually tastes bad...just that some people are bad cooks.
Friday, December 2, 2011
Mango Dal

Once upon a time I loved Indian food.
Once upon a time my husband hated Indian food.
Once upon a time I cried about this.... literally. Because I'm emotional. And because I wanted to cook it. And because I was imagining a future life in which I would never be able to cook Indian food for my husband.
Once upon a time I married a sweet, self-sacrificing boy who begged me to cook Indian food so I would stop crying.
Once upon a time I made "mango dal". You can find the recipe here. It was delicious and we both loved it. And it was healthy. And it as super fun to make. And I may have sauteed a pound of big beautiful shrimp to accompany the mango dal in order to thank the sweet, self-sacrificing boy for being sweet and self-sacrificing.
Once upon a time, a few weeks later, the boy requested mango dal for dinner.
Once upon a time I stopped crying and proclaimed victory.
Monday, November 28, 2011
the REAL DEAL mac and cheese

1) Hope you all had a fab Thanksgiving. Kate, I forgot to tell you: I'm thankful for you. I don't know what I'd do in this life without you!!!
2) So sorry we have neglected our sweet little blog. Please forgive us.
3) Remember that "creamy" mac and cheese I posted a few weeks back? FUH-GET-ABOUT-IT. I mean, yes, it's tasty, but ya'll. YA'LL. You have GOT to- I mean GOT TO- make this right here make and cheese. Here's what Kate and I analyzed after we both made the last kind: mac and cheese is just one of those things that was meant to be unhealthy. So while there are some perfectly yummy recipes that are "healthy" versions of mac and cheese, those recipes do not yield the rich creaminess that this recipe yields. It's a replica of the mac and cheese at Panera and if you've ever had their mac and cheese, well then, you know creamy. I promise you, after trying this version, you WON'T GO BACK. I was SHOCKED to be making a bechemel sauce in the microwave- but I don't know that I'll ever go back to the stove after how creamy and perfect this bechemel turned out. Here were the changes I made to the recipe:
-used 2 cups whole milk instead of whatever he said
-omitted the American cheese
-added parmesan
Your husband, kids, wife, uncle, grandpa, grandmother, second cousin, best friend, aquiantence, WHOEVER, will thank you.
M
Saturday, November 19, 2011
Friends and Fennel Seed

Last Sunday morning I had breakfast with my dear friend, Brynn, and her sweet husband, Tom. Brynn and I went to college together and were in the same sorority. Now she lives an hour and half away so I get to see her occasionally. Last weekend, Anthony and I were at a retreat and Brynn babysat my darling dogs (for that I am forever grateful). I'm afraid my ill-behaved pets may have had a bad influence on her new puppy, because she says that Waffles thinks he's a "wild dog" now.
Now, something you should know about Brynn: she has impeccable taste. She served me french-press coffee out of her beautiful blue china tea cups and toasted dill bread that she made herself.
Coffee, blue china, dill bread, and beloved friends.... You probably have stuff like that in Heaven.
I loved the bread so much that I came home and made it the next day. I substituted the dill seed for fennel seed to give it a little international flare. I also used half whole-wheat flour and half all-purpose flour, because I'm a health freak. The bread is kept moist by creamy, delicious cottage cheese and is a bit of a time commitment, as most good breads are. Let me tell you, it is well-worth the wait.
It's the Pioneer Woman's recipe. You can find it here. Make it and share with friends that you love and miss.
Tuesday, November 8, 2011
A weeknight fav.

Guys, Kate and I were just discussing today how we have yet to post one of the easiest, most delicious recipes we keep in our repertoire of recipes. It's this broccoli and peanut stir fry. Most people have peanut butter laying around and peanuts from something or the other (or maybe you buy mixed nuts but eat AROUND the peanuts so now you have a bunch of peanuts left over- or is that just me?). Well if that's the case, then you're half way there. Change up the vegetables if you don't have broccoli or you don't care for red pepper. Either way, try this dish- you won't be sorry because it's cheap, easy, and DELICIOUS. All you college kids out there (Hi Mal, Robin, Julia and Elle!), THIS is what you want to be making!
M and K
Monday, November 7, 2011
homemade laundry soap
My friend Jenni has introduced me to all kinds of wonderful new things (she's the one I accredit the homemade yogurt to) and one of these new wonderful things is homemade laundry soap. Did I mention that all of the wonderful new things Jenni has taught me are all incredibly cost effective? I just spent the last 20 minutes doing the math on this. It is quite literally the most revolutionary thing ever. EVER. You can do the math on your own because me trying to explain it will send your mind into stress. It sent mine into stress, but basically here's what you need to know: It will cost you about $8 to buy all the products you need and it will yield you 192 loads- 192 PEOPLE! So, if you do 3 loads a week, you'll have 64 weeks of laundry soap! ALL FOR UNDER $10!!!! Have your minds registered with this fact: that's over a YEAR'S worth of laundry soap!!! for around $8!!!!
I just can't contain my excitement. Scott Mayo, I am saving us SO much money! If a regular detergent that yields 64 loads is around $5, you might buy detergents once a month, so that's $60 over a year for laundry detergent- and that's if you are doing a minimal amount of laundry! This recipe saves you at LEAST $50 and MORE if you are doing lots of laundry!
here is the recipe for homemade laundry soap.
This is someone else's website and ingeniousness- Jenni introduced me to the site she uses- this is not her original idea!
Grammy and JoJo, I realize that this method has been around for a long time, but apparently it's the new trend to do things the old school way :) And for those of you on a budget like myself, old school is budget school!
M
Sunday, November 6, 2011
here's what I've learned
....since this blog is supposed to be dedicated to life lessons, as well.
When it comes to baking (my secondary skill to cooking although this lesson CERTAINLY applies to some of my cooking), it normally takes me at least 2 times to make something before I have perfected it. I should remember this before I make NEW desserts when going to someone's house!!! This is NOT the first time it has happened. I need to stick with making a dessert that is FOOL proof and is always delicious. Where is this coming from? Oh I'll tell you. I am making Salted Caramel Shortbread and I was doing an EXCELLENT job of keeping an eye on the caramel, stirring it constantly (because if you'll remember back to a couple months ago, I didn't do that on my several attempts to make that Wolfgang Puck caramel and it ended up black as asphalt in the sink) yet STILL- there are suddenly brown specks I see in my beautiful caramel. That dadgom sugar had "crystalized" (so I'm calling it) at the bottom of the pot because I didn't incorporate the ingredients properly before putting it over the heat. So, now I've got a lovely caramel with a slight burned flavor because of those minor burned pieces. Fabulous.
Ya live and learn, people, ya live and learn.
M
Saturday, November 5, 2011
creamy and tangy tomato basil soup
...and "life changing" apparently, according to my friend in whose honor I am posting this recipe, Melissa Gunter.
Serves approximately 4
You'll need:
-1-2 tablespoons of olive oil
-1 28 oz. can of crushed tomatoes (I used 'Contadina' but would have used San Marzanos if I had them)
-4-5 cloves of garlic
-1 yellow onion (medium sized) chopped
-fresh parsley (a small bunch)
-fresh thyme (" ")
-1 bay leaf
-1 teaspoon of dried oregano (I'm pretty sure I used this- if not, it won't hurt anything to add to your version)
-handful of beautiful, fresh basil (I used the last batch of my potted stuff- It wasn't uber abundant but still made a delicious soup so just use what you have. Melissa, go to the store in the fresh produce area to accumulate all of these fresh herbs. They've gotta be fresh)
-3 tablespoons (or so) of freshly grated parmesan
-red wine (if you have it, if not just omit)
-1/2 cup chicken stock (or more if needed- I'm just estimating here)
-1/2 cup milk or use however much you want until you achieve the desired pink-ish color (I had some evaporated milk left over with some 1%....I feel like the evaporated milk added to the creaminess of the soup, but I could be making that up)
-special need: kitchen twine. the butcher can hook you up with this but some big grocery stores sell this
What you do:
-heat your olive oil in a stock pot over medium heat and sautee your onions and garlic, adding a pinch of salt
-using kitchen twine, tie your parsley, thyme, and bay leaf together and add to the stock pot
-sprinkle in your oregano (if using)
-once you have some color on your onions and they are translucent, de-glaze your pot with a splash of red wine
-allow that to reduce down for a couple minutes (again, skip this step if you don't have red wine)
-add your can of tomatoes, and another big pinch of salt (according to Ina, tomatoes take in A LOT of salt)
-add your chicken or vegetable stock and bring this up to a boil, then turn it back down to a simmer
-I probably let it simmer for close to 30 minutes or so, but you could go longer if you put the heat on reallll low
-grate your parm into the soup and stir, then taste for seasonings
-put your soup in a blender and add the basil
-heat your milk up in the microwave for 30 seconds to get it to room temp (my dear friend Jenni reminded me of this VERY important step so that the milk doesn't curdle! Or any dairy products you cook with, for that matter)
-add the milk to the soup in the blender and blend away, adding the amount of milk you want until the soup looks like the color you want it to (could that have been a longer sentence?)
***some notes: you could add so much variation to this soup, such as sauteeing carrots with the garlic and onion, adding red pepper flakes, using white wine, or even balsamic vinegar to deglaze....etc.


on a side note, the next soup I will be making I had last night at my friend Megan's house- she made Giada's white bean soup (I think that's what it's called?) and HOLY AMAZING was it good. I never thought white bean soup could taste so good. And Megan had it PERFECTLY, I mean PERFECTLY, seasoned...so much so that I secretly envied her perfect seasoning skills (as my hand has been a little heavy with salt lately...trying to work on it). Also, she made another Giada dish (didn't catch the name) but it was packed with delicious things and good things FOR you (lots of great veg!)- it was the perfect "having guests" menu. Thanks again for having me, Megan!!!
Serves approximately 4
You'll need:
-1-2 tablespoons of olive oil
-1 28 oz. can of crushed tomatoes (I used 'Contadina' but would have used San Marzanos if I had them)
-4-5 cloves of garlic
-1 yellow onion (medium sized) chopped
-fresh parsley (a small bunch)
-fresh thyme (" ")
-1 bay leaf
-1 teaspoon of dried oregano (I'm pretty sure I used this- if not, it won't hurt anything to add to your version)
-handful of beautiful, fresh basil (I used the last batch of my potted stuff- It wasn't uber abundant but still made a delicious soup so just use what you have. Melissa, go to the store in the fresh produce area to accumulate all of these fresh herbs. They've gotta be fresh)
-3 tablespoons (or so) of freshly grated parmesan
-red wine (if you have it, if not just omit)
-1/2 cup chicken stock (or more if needed- I'm just estimating here)
-1/2 cup milk or use however much you want until you achieve the desired pink-ish color (I had some evaporated milk left over with some 1%....I feel like the evaporated milk added to the creaminess of the soup, but I could be making that up)
-special need: kitchen twine. the butcher can hook you up with this but some big grocery stores sell this
What you do:
-heat your olive oil in a stock pot over medium heat and sautee your onions and garlic, adding a pinch of salt
-using kitchen twine, tie your parsley, thyme, and bay leaf together and add to the stock pot
-sprinkle in your oregano (if using)
-once you have some color on your onions and they are translucent, de-glaze your pot with a splash of red wine
-allow that to reduce down for a couple minutes (again, skip this step if you don't have red wine)
-add your can of tomatoes, and another big pinch of salt (according to Ina, tomatoes take in A LOT of salt)
-add your chicken or vegetable stock and bring this up to a boil, then turn it back down to a simmer
-I probably let it simmer for close to 30 minutes or so, but you could go longer if you put the heat on reallll low
-grate your parm into the soup and stir, then taste for seasonings
-put your soup in a blender and add the basil
-heat your milk up in the microwave for 30 seconds to get it to room temp (my dear friend Jenni reminded me of this VERY important step so that the milk doesn't curdle! Or any dairy products you cook with, for that matter)
-add the milk to the soup in the blender and blend away, adding the amount of milk you want until the soup looks like the color you want it to (could that have been a longer sentence?)
***some notes: you could add so much variation to this soup, such as sauteeing carrots with the garlic and onion, adding red pepper flakes, using white wine, or even balsamic vinegar to deglaze....etc.

(Sorry friends, by the time I remembered to take a photo, I had eaten half of it. It was so tangy and scrumptious I'm surprised I even remembered to take a pic!)

You're gonna need to make a grilled cheese with this to dip. It's actually mandatory.
on a side note, the next soup I will be making I had last night at my friend Megan's house- she made Giada's white bean soup (I think that's what it's called?) and HOLY AMAZING was it good. I never thought white bean soup could taste so good. And Megan had it PERFECTLY, I mean PERFECTLY, seasoned...so much so that I secretly envied her perfect seasoning skills (as my hand has been a little heavy with salt lately...trying to work on it). Also, she made another Giada dish (didn't catch the name) but it was packed with delicious things and good things FOR you (lots of great veg!)- it was the perfect "having guests" menu. Thanks again for having me, Megan!!!
Friday, October 28, 2011
creamy, one pot mac and cheese
Ok people. This is revolutionary. I read this recipe on Pinterest, changed a few things, and added a little pizzazz to it to make it my own. The basic idea is to cook the macaroni IN THE MILK- that's right. In the milk. After a while of simmering, you add your cheese (whatever kind you want). It's creamy, delicious, so comforting, and healthiER (healthier=not necessarily eating straight bulgur wheat but a great healthy alternative to a mac and cheese made with a rich white bechemel sauce). You can always put it in the oven with some bread crumbs if you like that oven baked taste. Here we go:
Ingredients:
4 cups large elbow Macaroni, uncooked (or whatever kind of pasta you want)
4 cups milk if needed, additional 1/4 cup milk for final cooking (note: I have used 1% and while it has been delicious, it does not yield the creamy results that whole milk would provide. keep that in mind!)
1 teaspoon dijon mustard (or you could use ground mustard)
4 cups milk if needed, additional 1/4 cup milk for final cooking (note: I have used 1% and while it has been delicious, it does not yield the creamy results that whole milk would provide. keep that in mind!)
1 teaspoon dijon mustard (or you could use ground mustard)
1 onion, diced (small to medium sized- or whatever you have)
3 cloves of garlic (chopped)
a dash of oil
a dash of oil
1 bay leaf
1 teaspoon salt (or to taste)
1 teaspoon salt (or to taste)
generous dash of nutmeg
1 block (16 oz or so) of grated cheese (should be 2 cups), any one or combination of (I used sharp white cheddar- inspired by Panera's mac and cheese- and parmesan because it's what I had. delish.)
1 block (16 oz or so) of grated cheese (should be 2 cups), any one or combination of (I used sharp white cheddar- inspired by Panera's mac and cheese- and parmesan because it's what I had. delish.)
**serves around 6 people (makes GREAT leftovers for those of you with households of 2!)
Directions:
- In a medium saucepan, heat your oil and saute your chopped onion and garlic over medium heat until you get a little brown color on your onions
- Add your nutmeg and bay leaf
- Add your milk, macaroni, and dijon
- Bring the mixture to a simmer over medium heat. Stir your pasta pretty regularly because if not, it will all clump together so don't walk away!
- Once your milk simmers, turn it down to low (the original recipe inventor said if the milk is too hot, it will evaporate too quickly)
- Cook for 15-20 minutes, or until milk has absorbed into the macaroni. Add more milk if the macaroni isn't fully cooked and cook for another 5 minutes, or until cooked. I didn't let my milk evaporate completely because I still wanted a creamy sauce. To each his/her own.
- Stir in your cheese(s)
- The original recipe says to turn off the heat and put the lid on the pot so the macaroni can continue to absorb, but I didn't do this because I got the consistency I desired.
- You could put it in an oven proof dish and add more cheese or panko bread crumbs and stick it in the oven if you want, or just eat it as is!
***PS I added roasted cauliflower to it and tonight I am adding roasted broccoli for color (and nutrients, of course!)
Wednesday, October 26, 2011
Italian Hazelnut Cookies: Channeling My Inner Green Fairy

Do y'all remember the fairies from Sleeping Beauty? My sister, Robin, and I used to love Sleeping Beauty. We used to pretend that we were the fairies fluttering around to save Princess Aurora. Naturally, I was always the red fairy, the leader, because I was the oldest and the bossiest. Robin was the green fairy because she was the middle child. We made Joseph be the short, fat, blue fairy. (He was too little to object).
This week I made dinner for a family who follows a gluten-free lifestyle. After the meal was prepared, I got ambitious and decided to also make them cookies. I figured that the gluten-free persons of this world probably don't get to eat cookies very often and that is a tragedy. I found these wonderful gluten free hazelnut cookies called "Brutti Ma Buoni" which means "ugly but good" in Italian. Only five ingredients... surely I can handle that.
If you regularly follow this blog, you've heard me lament about how I don't have the baking gene. I've become a pretty decent cook, but I'm a miserable baker. Enter the green fairy. There's this wonderful scene in Sleeping Beauty where the green fairy tries to bake Princess Aurora a birthday cake. Despite all her efforts and passion and positive attitude, she gets it all wrong. She ices the cake and tops it with candles before even getting it into the oven. While separating the egg yolks from the whites for my hazelnut cookies, I was feeling the green fairy's pain:

See that face? That was my face.
Eventually the green fairy gives up and summons her magic wand for help. With just a few flicks of that magic wand all is better in the fairy's cake baking world.
A whole carton of broken eggs and a few failed batches of batter down the drain later, my cookies actually turned out well. I was able to channel my inner magic wand ... eventually.
If you are interested in watching the clip from Sleeping Beauty so you can understand what the heck I'm talking about, click here.
Sunday, October 23, 2011
Hot Chili Oil

Last week I ran out of olive oil. This has been problematic... olive oil is kind of a key ingredient in the kitchen...
I keep forgetting to pick some up at Kroger, so when I return home to cook, I'm in a bit of a pinch.
Well, I don't have olive oil, but for some strange reason I have "hot chili oil". No idea why.
Since I can't seem to remember to actually buy olive oil, I have been using this hot chili oil as a replacement. The results have been surprisingly good!
It is pleasantly flavorful and spicy. It adds a unique flavor and depth to your dishes...
Last week I used it in a "Texas-style" red beans and rice. Today I added a splash to an asian noodle soup. Don't get me wrong, it adds quite a kick to the food, but if you're like me and you like heat, you'll think it is soooo gooood.
It's true. "Necessity is the mother or invention".
Friday, October 21, 2011
Chicken Pot Pie. Snuggle Me in a Blanket.

Once upon a time,
It was fall in Houston, Texas. Even though there weren't any pretty colored leaves and it wasn't quite cold enough to wear a scarf, the people of Houston were craving home-y, snuggley meals that reminded them of fire places, old books, and warm cuddly blankets.
I made chicken potpie the other night.
Are you impressed? I was impressed. It was quite good.
Now, my mother never made chicken potpie when I was a child... but I'm sure your mother did... So at least I was reliving somebody's childhood.
In the spirit of this blog, I made this chicken potpie on a major budget. Instead of the traditioanl ingredients, I used two medium sweet potatoes, a package of frozen peas, one organic chicken breast, and one small onion. I topped it with my friend's grandmother's pie crust (see the blog entry "Fig and Plum Pie").
I could give you the step by step details of this comforting meal, but I'm too lazy. I adapted it from the Cooking Light recipe. To see this recipe and even watch a little demo video, click here.
Once upon a time,
I thought I didn't like chicken potpie. Then I tried this recipe and realized that... I do. I do indeed like it. You will, too.

Wednesday, October 19, 2011
sea salted caramels
Friends, I admit. It's taking me WAYYY too long to complete my "Food Network Recipe Box" challenge. Although this recipe isn't from my recipe box, it's still from Food Network so we're going to pretend like this puts me one step closer to completing my challenge. I made these morsels of goodness for my precious, precious friend in my MSW program, Melissa. I took pictures along the way since caramels can be a little tricky to make. Melissa said she licked the wrappers clean and I've been craving these guys ever since making them. They are worth it to make for any kind of birthday where you don't know what to get the person (ie; your father in law who has everything he needs so what REALLY can you get him? food always wins), or any kind of occasion, really, but I warn you: to wrap them individually and work that caramel is time consuming so keep that in mind.
Ina says it yields 16 caramels- but I think you can go for a few more depending on the size you cut them.
Ingredients:

 then this:


Ina says it yields 16 caramels- but I think you can go for a few more depending on the size you cut them.
Ingredients:
- Vegetable oil
- 1 1/2 cups sugar
- 1/4 cup light corn syrup
- 1 cup heavy cream
- 5 tablespoons unsalted butter
- 1 teaspoon fine fleur de sel, plus extra for sprinkling (I just used my sea salt- much easier to find!)
- 1/2 teaspoon pure vanilla extract
- Prep the pan: Line an 8-inch-square baking pan with parchment paper, allowing it to drape over 2 sides, then brush the paper lightly with oil. (note: ANYTHING the caramel is going to touch you need to brush or spray with oil- YOU HEAR ME ON THAT? I PROMISE IT WILL MAKE YOUR LIFE EASIER!)

sorry for the awkward picture, but here's what you're doing:
- In a deep saucepan combine 1/4 cup water, the sugar and corn syrup and bring them to a boil over medium-high heat. Boil until the mixture is a warm golden brown. Don't stir -- just swirl the pan.
- meanwhile, the pot in the back is for the purpose of doing this:
- In a small pot, bring the cream, butter and 1 teaspoon of fleur de sel to a simmer over medium heat. Turn off the heat and set aside.


- once your sugar mixture (caramel) has reached this gorgeous, rich deep color, you add the cream mixture. CAREFUL/CUIDADO! It will bubble up "violently" as Ina says.
- stir in your vanilla with a wooden spoon and cook over medium low heat for around 10 minutes, until the mixture reaches 248 degrees (firm ball) on a candy thermometer (it will look like this:)

- now pour your hot caramel into your prepared dish and refrigerate for several hours- I mean SEVERAL. I think I may have used too deep of a dish, causing the caramel to be SUPER thick in width (which is fine, and still yields the same delicious results, just a little more difficult to work with) so yeah yeah, Ina says to use an 8x8, but I think you could get away with something that will make the caramel spread out a bit more- you feel me on that?
- So, after your caramel has refrigerated, it's ready to be cut. This is how Ina says to do it (because I am no where near smart enough to try and tell you how):
- Sprinkle the log with fleur de sel, trim the ends and cut into 8 pieces. (Start by cutting the log in half, then continue cutting each piece in half until you have 8 equal pieces.) It's easier to cut the caramels if you brush the knife with flavorless oil like corn oil. Here's how mine looked if it helps:

this is half a log- I cut it straight down the middle length wise- "hot dog" style, if you will
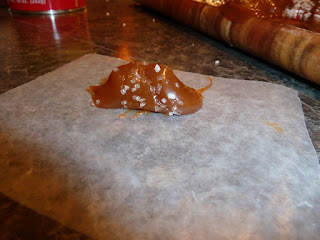
From here, I manipulated the caramel and plopped it on a square of wax paper I had cut out like so:

I then wrapped the little treasures up to look like this (per Ina's instructions- I am not creative enough to think of this!):

There you have it. OUT OF THIS WORLD CARAMELS!!!
Click here for full recipe
Make these as SOON as you can!! They are SO worth the labor- especially if you are trying to impress somebody! (like your father in law!)
Tuesday, October 18, 2011
Homemade Yogurt
Yes. You read correctly: homemade yogurt. Who knew such a magical thing existed!? I learned about this last night when I went to my precious friend Jenni's house and she and her husband made HOMEMADE YOGURT right before my very eyes. She actually got the recipe from our other precious friend (with a new precious baby girl I might add), Emily. So, Jenni, by way of Emily, THANK YOU for sharing this recipe with me! And Emily- thank you for being in the loop on cool stuff like this!
Jenni did the math for me- and while I can't reiterate the numbers for you (although Jenni or Emily please feel free to do so in the "comments"), it saves A LOT of money to make your own yogurt as opposed to buying the fancy Greek yogurt that everyone loves (which is why I strain my yogurt- but still, I end up with only HALF of what I bought by the time all the juices drain out of the yogurt!)
So, here's what you do (this is Jenni's recipe- this is not an original- although I wish I could take credit for such an incredible invention!)
- · Take a medium-sized saucepan and fill with 8 cups of room-temperature milk (ours isn’t always room-temp and it still turns out).
- · Place the medium-sized pan inside a large saucepan and fill the large pan with water up to the level of the milk.
- · Double boil the milk until it reaches 190 degrees F, stirring frequently
- · While the milk heats up, create an ice bath in the sink (about the same level as the milk in the saucepan).
- · Once the milk reaches 190 degrees, place the saucepan in the ice bath and let cool until it is 110 degrees.
- · While the milk cools, preheat oven to warm and turn on the light.
- · Gently whisk in 1-2 tablespoons of plain yogurt (from the store or a previous batch) and cover.
- · Put a towel over the saucepan cover and place in the oven. Turn the oven off!
- · Let sit overnight, for up to twelve hours.
- · To make your yogurt greek, strain (use a coffee filter and colander) for about 1-2 hours.
- · Freeze liquid whey to use in smoothies and sauces.
That's it! We're all about saving the $- here's one GREAT way to do it!
Tuesday, October 11, 2011
Gourmet Pizza
This is me not wanting to study for my midterms. BLAHHHHH! I mean, I love school, I love school, I love school.
Ok I'm done now. Just had to get that off my chest. On to more important things such as the fuel that keeps me going....GOOD FOOD! So, living in Columbus, I have missed my Publix VERY VERY much, HOWEVER, now that I go to school in a town where there IS a Publix, I sometimes stop by there when I need a quick shortcut to make din din. Last week this shortcut came in the form of Publix's amazing homemade pizza dough (found in their bakery). I knew I had a bunch of stuff at home that I could put on this pizza, but I was also craving some other little goodies such as fresh mozzarella (I'm sorry, but the other stuff just doesn't compare) and an arugula salad to go on top. Here was a picture of what it looked like:
 I didn't do the step by step picture thing because honestly, this was a fly-by-the-seat-of-my-pants kind of meal and I didn't know it'd turn out to be so good. So, here's a list of what I put on it:
After the cheese was melted, I put on the following:
Really, you can put anything you want to on pizzas, but I encourage you, however you make it, please try a salad of arugula (with reduced balsamic!) on top. It will truly blow your mind.
Back to studying....
M
Ok I'm done now. Just had to get that off my chest. On to more important things such as the fuel that keeps me going....GOOD FOOD! So, living in Columbus, I have missed my Publix VERY VERY much, HOWEVER, now that I go to school in a town where there IS a Publix, I sometimes stop by there when I need a quick shortcut to make din din. Last week this shortcut came in the form of Publix's amazing homemade pizza dough (found in their bakery). I knew I had a bunch of stuff at home that I could put on this pizza, but I was also craving some other little goodies such as fresh mozzarella (I'm sorry, but the other stuff just doesn't compare) and an arugula salad to go on top. Here was a picture of what it looked like:

- roasted garlic (had some left over that I only used half the bulb for so I squeezed out the rest of the roasted garlic onto a cutting board, sprinkled it with some salt, and with the back of a knife, smeared it into a paste. I then smeared this onto the pizza dough)
- fresh Kumato tomatoes (they look kinda purple but any kind will do)
- fresh mozzarella
- purple onion
After the cheese was melted, I put on the following:
- chopped up prosciutto (I just happened to have this gourmet ingredient laying around- don't ask me why)
- an abundance of freshly chopped basil
- an arugula salad (literally- the best thing you can do with pizza is lightly dress arugula and toss it on top of a pizza- don't you dare disagree with me, Scott Mayo.)
Really, you can put anything you want to on pizzas, but I encourage you, however you make it, please try a salad of arugula (with reduced balsamic!) on top. It will truly blow your mind.
Back to studying....
M
Monday, October 10, 2011
Acorn Squash Soup: Autumn in a Bowl

I have been obsessed with soup-like-things ever since we entered the month of October...perhaps because, in my mind, October officially marks the beginning of autumn... never mind the 90 degree Texas heat. I don't care how hot it is outside. I'm sick of summer and I will boldly wear scarves, burn pumpkin-scented candles, and make warm, comforting soups no matter what the thermometer says. Give me autumn liberty or give me death.
I know I get a bit dramatic. Roll with it.
Since Anthony always eats pizza with his youth on Sunday nights, I get to make dinner for myself and try new, crazy things that I would not expect him to jump with joy over.
I was in a vegetarian mood, so when I walked in to Kroger I picked up a plethora of interesting fall vegetables with which I had never cooked. Don't you just love cooking adventures? My bounty included:
1 gorgeous acorn squash
1 bunch of radishes
1 large rutabaga
1 turnip
I cut it all up, drizzled it with olive oil and seasoned it with salt, pepper,and plenty of fresh thyme. Although the end result was visually appealing with all the lovely muted colors...

It wasn't too tasty.
But was I about to let all that labor go to waste? Oh no. Not yet. There was only one hope for these little veggies to reach their full culinary potential. Simple roasting was unsuccessful... but what if I pureed them into a soup?
I returned my test subjects to the oven, placed them close to the heat, and roasted the patootie out of them until they got super soft and started to develop a caramel color.
After being pureed in a blender, added to a pot with a couple of cups of chicken stock, then livened up with a splash of milk, I had the most wonderful fall soup! Silky and velvety and warm and comforting and distinctly AUTUMN. Yes.
Serve with a green veggie for the purposes of striking color contrast. Also serve with fresh bread... because we all know that carbs = love.
Oh, and if you need to indulge your carnivorous husband, garnish the soup with some crispy, crumbled turkey bacon.
coming soon....
-pizza with smeared roasted garlic, prosciutto, and arugula salad
-fleur de sel caramels
sorry for the lack of posting recently! Kate and I have been busy with school and work! When I'm back near my computer cord and have my sanity back, I will post recipes to the above foods!
Peace, Love, and Good Food!
M&K
-fleur de sel caramels
sorry for the lack of posting recently! Kate and I have been busy with school and work! When I'm back near my computer cord and have my sanity back, I will post recipes to the above foods!
Peace, Love, and Good Food!
M&K
Friday, September 30, 2011
Gnudi

Ingredients:
- 1 cup whole milk ricotta cheese
- 1 pound frozen spinach, thawed and squeezed dry
- 1 cup grated Parmesan
- 2 eggs
- 2 egg yolks
- 1/4 teaspoon freshly grated nutmeg
- 1 teaspoon salt
- 1 teaspoon freshly ground black pepper
- 5 tablespoons flour, plus 1 cup for coating(I used 6 tablespoons)
- marinara sauce
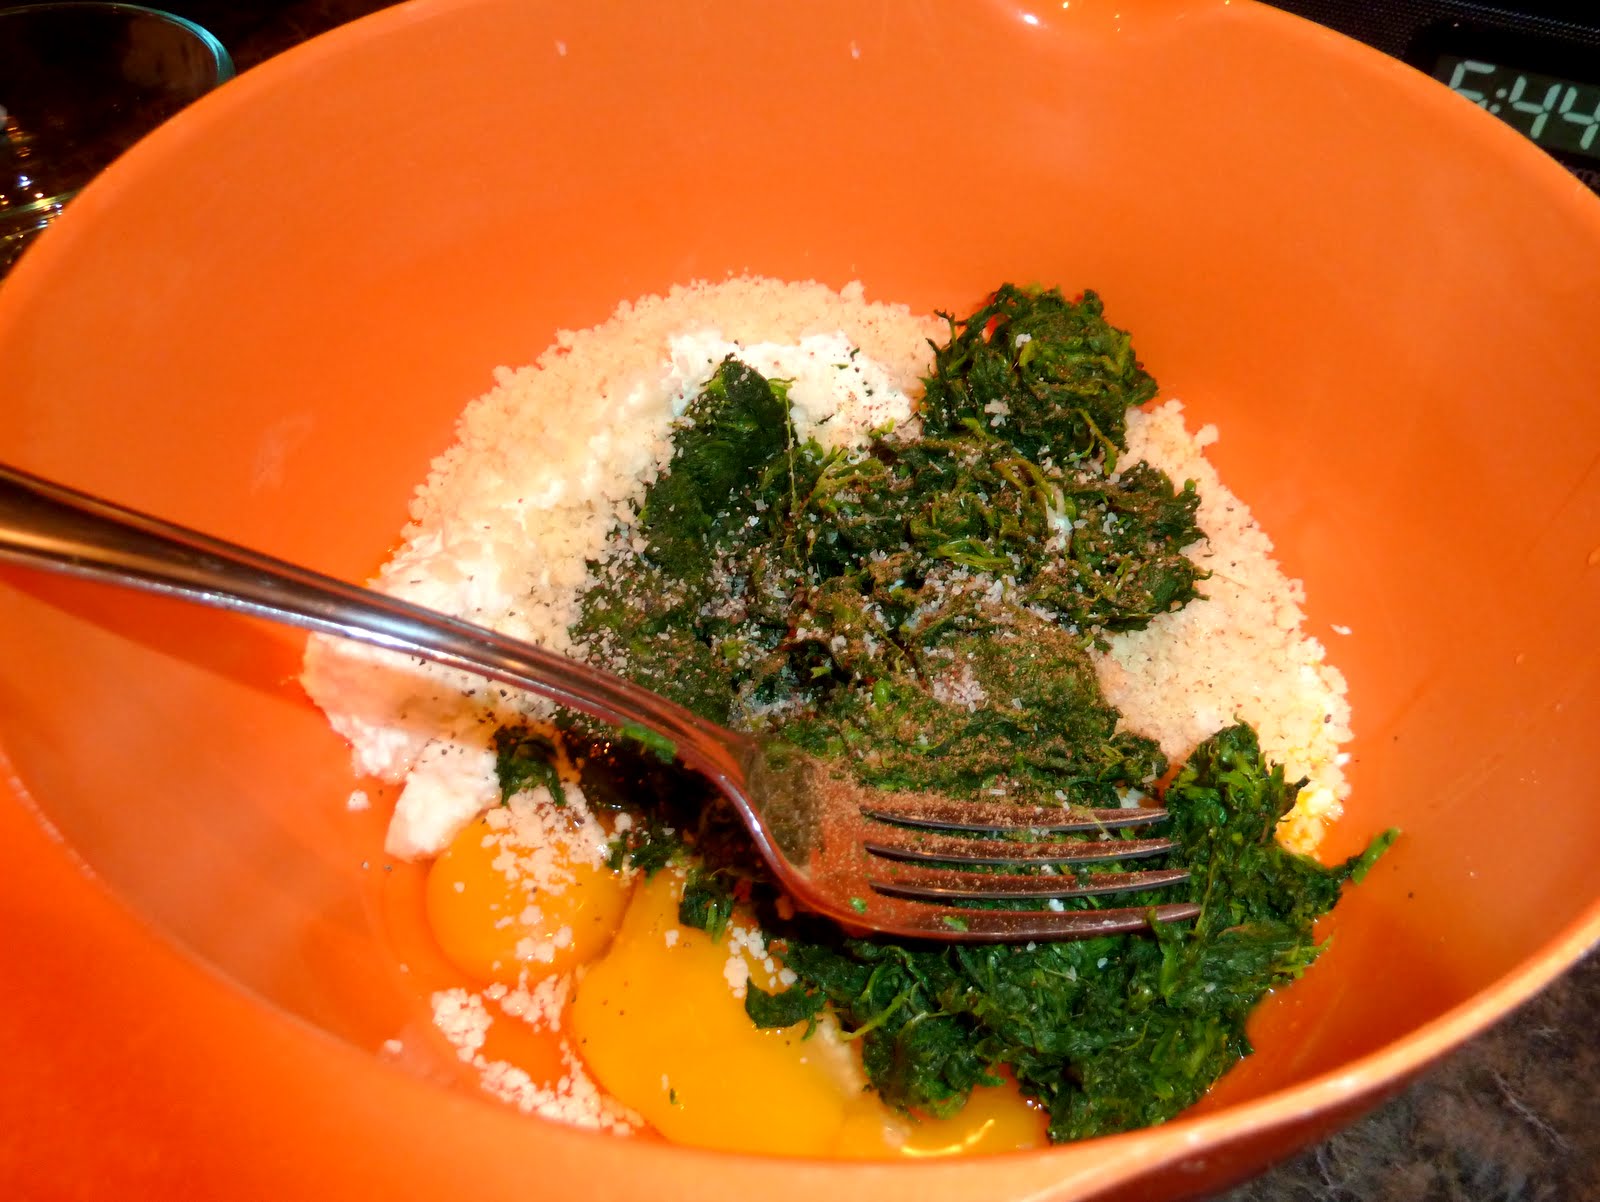
throw everything but the flour into a bowl (during this time, start a pot of boiling, salted water- not a rolling boil, but a good, medium boil...if there ever was such a thing)

mix everything together, then add your tablespoons of flour and mix in

form your mix into ball/oblong shape thingies. coat with flour

shake off excess flour

slowly and carefully drop your dumplings (4 at a time if you have small pot) into the boiling water. let them boil for 3-4 minutes. when they are done, they will surface to the top like the one pictured.
***Note: if you didn't add enough flour, they will fall apart (apparently- and I believe it after dealing with the stupid gnocchi s...forgive the anger. I'm still recovering from my failure.) If you follow the amount in the recipe, you'll be fine.
*serve with marinara sauce- here are my new found secrets that produced THE.BEST.MARINARA SAUCE I HAVE EVER MADE:
- roast your veg (a few sticks of carrots, 2 onion halves) to get some color- 400 degrees for about 40 minutes
- once cool, slice into big chunks and throw into your food processor with 3-4 cloves garlic
- add oil to a pot, and add your "sofrito" (your veg mix) and cook over medium for 10 minutes
- add a bay leaf and some oregano (maybe a teaspoon or so) as well as a good pinch of sugar
- deglaze pan with 3/4-1 cup of red wine and let it reduce for 4 minutes
- add 1 28 oz. can of diced or crushed tomatoes along with another smaller can
- add plenty of salt and some pepper, and partially cover and simmer for 1-2 hours.
- serve over gnudi as an appetizer or a main entree with salad or whatever you want!
Tuesday, September 27, 2011
Tomatillo and Ancho Chile Salsa

My husband works at a church, which means that, for our family, Sunday is not a day of rest. He's gone from about 7:30am-9:30pm every Sunday. Boo.
However, he gets a few hours off during the afternoon when he comes home exhausted and famished. I have thus taken it upon myself to make Sunday Lunch a household tradition. A big deal. This way my hungry, hard-working man gets a hearty meal that will propel him into an epic Sunday afternoon nap, rejuvenating him for the evening activities back at the church.
This Sunday I chose to hearken back to my imaginary Latina roots where the women cook with clay pots and the air smells like mangos and spices. Isn't it wonderful that I have these beautiful imaginary memories to draw upon when I need inspiration in the kitchen?
I made "migas", a Mexican brunch dish, and topped it with the most wonderful salsa I have ever tasted. The migas were truly delightful, but I shall save that post for another day. This salsa was the star of the show, and I'm particularly proud of it because it is a completely original recipe. It's unique, too, using dried ancho chile and chipotle pepper to give it a distinct smokey flavor. I think you'll like it!
Ingredients:
- about 3/4 lb tomatillos
- 1 small-ish yellow onion
- 3 cloves of garlic
- Juice and zest from 3 small limes
- 3/4 of a bunch of cilantro
- 1 dried ancho chile
- 2 serrano chilis, seeded, de-vained, and diced. We like it HOT in our home, so use less if you can't take the heat.
- 1 chipotle pepper (these come in a can, preserved in adobo sauce. find it in the international section of your grocery store. they keep forever.)
Directions:
1. "Re-constitute" the ancho chile. This means that we're going to bring it back to life by steaming it. There are many ways you can do this. I take a Tupperware container, fill it with water, microwave it for 3-4 minutes, add my chile to the water, put the top on, and let the steam do all the work. It will be all plump and lovely in about 10 minutes. Remove the chile from the water, take out the seeds and the stem, set the flesh aside.
2. Quarter your tomatillos and your onion. Place them on a baking sheet with the garlic cloves. Drizzle it all with canola oil (or avocado oil if you're like me and trying to use all the fancy kitchen ingredients you got as wedding gifts). Sprinkle with salt. Roast all of this for 17 minutes in a 400 degree oven.
3. In a blender or food processor, combine all your ingredients and give it a whirl! You may have to do this in batches. It's ok. It will still be delish.
Enjoy!
P.S.
The above photo is not mine. I found it on google. I have all these friends that are really in to photography and, since being around them, I've started noticing and caring about photography way more than I ever have before. This is bad news, because I'm a terrible photographer. Because my picture of the salsa was abominable, I was forced to borrow someone else's.
Saturday, September 24, 2011
Honey Oat Bread: A Baking Breakthrough

I just watched the Pioneer Woman's new cooking show on the Food Network. Meredith and I, texting all the while, decided that PW is much better as a blogger than as a Food Network actress.
If you have not discovered the Pioneer Woman's blog, click here. I particularly enjoy her "Confessions" section of the blog, because she is always writing about her ridiculous basset hounds... and I'm a sucker for anything about ridiculous dogs.
(I know what you're thinking. You're thinking I am one of those lame dog people. Well... I am. Back off. Dog people unite.)
Anyway, watching the Pioneer Woman's show put me in the mood to blog. So I flipped through the pictures on my phone and realized that I have SO MANY pictures of meals that I made this month that I have not shared with you! Why is that? Oh yeah... because I was supposed to be making recipes from Clean Eating but was covertly being unfaithful to the September Challenge. Sigh....
This recipe is from EatingWell. Shocker. With all the publicity I give them on this blog, I think they should be paying me.
Traditionally I have been a complete failure when it comes to baking. Cookies, cakes, breads, muffins... all of this homemade goodness has been unavailable to me because I fail every time. It all either comes out flat and hard or spongy and chewy. Eww. Out of fear of failure, I simply avoid baking all together.
Although still intimidated, I have recently been dipping my toe in the baking world. I'm craving a challenge. Plus, we should not let fear of failure dictate our life choices. That’s just a terrible way to live.
I made this delightful honey oat bread for small group… and because I was afraid it wouldn’t turn out, I brought along some store-bought bread, too.
It’s soooo good and soooo easy, which is good news for a baking novice like me. It’s also healthy! Which you know makes me happy. It is sweetened with raw honey, kept moist with yogurt, and uses half whole wheat flour, half all purpose flour. And it came out beautifully!
CLICK HERE FOR THE RECIPE
A tip I learned from my friend, Hannah: Spoon your flour into your measuring cup rather than scooping it out of the bin. This keeps the flour nice and light and airy. She said something about how the “scooping” method packs the flour down too much and actually gives you more flour than you want.
A tip I learned from Meredith: Your eggs should be at room temperature when you are baking. I don’t know why. I don’t have any baking wisdom on this one. Just do it.
Yum yum yum. Everyone loved it and I was so pleased.
Oh, p.s.
Nobody touched the store-bought stuff :)
Subscribe to:
Posts (Atom)


