Thursday, January 5, 2012

So as you all know, many of the conversations Kate and I have are about food, what we're making for the week, what we made last week that was delicious, what we want to try, etc.  So, because I was a slacker and didn't take photos of the things I have made thus far this week, I am simply going to provide the links to what I've made and give you my review.  It's basically what Kate and I do everyday on the phone so consider yourselves privy to our conversations.  JUST KIDDING. We don't take ourselves that seriously :)

Monday night:
The Pioneer Woman's White Chicken Chili


(This is Ree's picture.  Again, with the slacker thing, I forgot to take a pic)


My review: absolutely delicious.  I served this with cilantro, monterrey jack cheese, and avocado.  I highly recommend a dollop of sour cream or yogurt on top.  Mine was also a touch more liquid-y.  Oh, and I didn't have corn meal or masa to thicken this with so I used cornstarch and milk and it worked perfectly. Also, I roasted my chicken with the same spices she used in the soup (as opposed to boiling it) and shredded it by putting it in my mixer (which, shreds chicken beautifully). Served with cornbread. YUM.


Tuesday night:
Ina Garten's butternut squash risotto with greens
(as you can see, the greens were a little more buoyant, shall we say, than the risotto)

My review: light, healthy, and delicious for any occasion.  To me, risotto is proof that you don't have to cook with butter and cream to make something creamy and delicious.  Sure, those two ingredients make MANY things better, risotto being one of them, but are they always necessary to improve a dish?  I would argue that no, they aren't.  Because the arborio rice develops its' starchiness as you cook it, you really don't need much more than cheese to make it creamy.  Here is the recipe for this risotto.  One trick I must tell you about that I learned from one of my mom's friends: microwave your butternut squash wrapped in plastic wrap for around 2 minutes.  You're going to be peeling the skin, anyway, so the contact with the plastic wrap won't matter.  This process makes it SIGNIFICANTLY easier to cut that beast of a vegetable.  Thanks for that tip, Twila!

Wednesday night:
Robert Irvine's Red Curry

Forgive me, no pic.  

My review: Ok, so here's the situation: Wednesday night was a night where we were working with what we had, and I had the ingredients for Red Curry so that's what we ate.  It was good, not great.  However, in Robert's defense, I also followed the recipe incorrectly and so while it was perfectly filling (and moderately healthy because of the vegetables and cooking with the LITE coconut milk) I would like to try it again, and this time, follow it correctly.  I think this recipe had the potential to be great (it got 5/5 stars under its' reviews).  I definitely needed to add a squeeze of lime at the end, so make sure you do that if you make this!

Tonight: Chicken Parmesan 

I'll holler back later with the review!

Monday, January 2, 2012

Coconut Cake

Merry belated Christmas and Happy New Year!  I am so excited to share this incredible recipe with you for coconut cake.  My sweet friend (and roommate for the last few weeks), Kristi, told me to check out the Peninsula Grill's recipe for coconut cake. I was about to use Paula Deen's, which was good to me last year, but after having this cake, I won't go back to dear ole' Paula's recipe.  I was in charge of making this for Christmas dinner.  I must warn you: this is going to be a fairly in-depth, picture-rich post.  The filling in this cake is the best coconut cake filling I have ever had.  The icing has a creamy, sweet, and slightly tangy cream cheese frosting that merries perfectly with the other flavors of the cake.  I love that you get the toasted coconut flavor from the outside of the cake, while still tasting the regular coconut within the filling.  You will be tempted to eat the filling before you put it between the cake layers.  But don't.  Good gracious is this cake ever incredible.  Just ask my sister, Mallory, who had a slice for lunch one day. Now let's get movin.

Takes 24 + hours (filling has to cool overnight)
Serves....a lot.

For the filling you will need:
  • 2 tablespoons cornstarch
  • 2 tablespoons water
  • 1 teaspoon vanilla extract
  • 1 1/4 cups whipping cream
  • 1/2 cup sugar
  • 1/2 cup unsalted butter
  • 2 1/4 cups sweetened flaked coconut
  • 1/4 cup sour cream
For the cake you will need:
  • 3 1/2 cups all-purpose flour
  • 1 tablespoon baking powder
  • 1/2 teaspoon salt
  • 2 1/4 cups sugar
  • 1 1/2 cups unsalted butter , room temperature
  • 5 large eggs
  • 1 1/3 cups whipping cream
  • 1 tablespoon vanilla extract 
(Note: you can really use any white/yellow cake recipe that you love.  I had to freeze the cake layers ahead of time which, I think, made them a touch more dense.  If you have to freeze your cake layers for preservation purposes, make sure you wrap them tight in a few layers on plastic wrap, but before doing so, brush them with a simple syrup to ensure moisture.  I'm going to try and make this cake again to see how it is without having been previously frozen.  I will say though, Paula Deen has a MEAN cake recipe.  Scott likes fluffier cakes, but if you prefer your cakes to be a bit more dense, this is your recipe.)

For the Frosting:
  • 2 (8 ounce) packages cream cheese , room temperature
  • 1/2 cup unsalted butter , room temperature
  • 2 cups powdered sugar
  • 1 teaspoon vanilla extract
  • 4 cups sweetened flaked coconut , toasted
Instructions:

 
Stir cornstarch, 2 tablespoons water, and vanilla in small bowl to dissolve cornstarch. 

 Bring cream, sugar, and butter to boil in a medium sized saucepan
Add your cornstarch mixture and bring to a boil
Remove from heat and stir in your coconut
Allow to cool completely

After it is cooled, stir in the sour cream

It will look like this:
Cover this and refrigerate it overnight.  

Now onto the cake:

Preheat oven to 375.
Butter and flour two 9 inch cake pans (the original recipe says 3 cake pans, but I used 2 and was just fine) 


Sift flour, baking powder, and salt together over a large bowl

 It will look like a powdery hill of goodness after you sift the ingredients

 Beat sugar and butter in a large bowl to blend
Add your eggs, blending well after each addition
Beat in cream and vanilla
Here's the batter before the flour mixture goes in 

STIR- or SLLOOWWWLLYY blend flour mixture into the butter mixture (don't overmix)

Here's your cake after the flour has been incorporated.  It will be thick.

Divide your batter evenly into your buttered and floured cake pans

Bake for 35 minutes, or until a toothpick inserted comes out clean

Cool cakes completely (I used a wire rack for this)

Note: in order for cakes to be super fresh, I'd make the filling the night before you intend to serve the cake, and bake the cakes the morning of.  This is one of those cakes, in my opinion, that needs to be made earlier in the day and served that night.  Putting cakes in the fridge DRIES THEM OUT- so avoid it!  Don't let leaving the cream cheese icing out scare you, my family left this cake out for days and we are all still cluckin' along like spring chickens.

Now onto the frosting: 

Leave your cream cheese out for a couple hours to get it at room temp
Beat cream cheese and butter in a large bowl to blend
Beat in (a little at a time) powdered sugar and vanilla until everything is incorporated

Now that your cakes are cool (completely cool), cut them in half so that you have 4 layers.

Spread your filling mixture between each layer

Now. now. now. now.  We talk frosting a cake.  I am not about to claim to be as good as Ina Garten, but I've learned a thing or two from that woman and I'd like to share it with you using pictures to demonstrate.

First, cut two long pieces of wax paper to criss-cross over each other on your cake platter BEFORE YOU SET YOUR CAKE ON TOP.  This prevents icing mishaps from landing on the platter so all you have to do when you're done frosting the cake is gently slide the wax paper out from under the cake!
Now, plop a hefty amount of frosting on the top layer in the middle of the cake.
With a knife or frosting spatula, spread the frosting across the cake and down the sides

Sorry, I already advanced a little bit in frosting the cake by the time I enlisted the help of a photographer.  Do you get the jist, though?  plop the icing, then slide it down the sides of the cake.  
 Then, rotate your spatula like I did in the picture, and while you frost, turn your platter
like so.
Ok, not that it's perfectly smooth, but it's lookin' pretty good.  Here's the trick: run your knife/spatula under hot water and wipe it off with a towel, then spread it over the icing while rotating the platter.  I wasn't as concerned about the sides because we are about to put some toasted coconut on it.

Take the toasted coconut and literally toss it on the side-gently
You like how some of my pics are edited and some are not? me too.

You'll notice a crucial mistake of mine in this pic: I only have one piece of wax paper.  BIG MISTAKE. Do what I advised up above (this piece of advice actually comes from Sandra Lee on the Food Network).


 The top of the cake, as you can see, has been marked with a hot knife to make it as smooth as it is.
 Isn't our final product a beaut?  A delicious beaut, at that!

Enjoy!

ps: for the straight-forward recipe, click here.

Sunday, January 1, 2012

Lessons from Anne


Anthony gave me Anne Burrell's new cookbook for Christmas. This is how I felt when I opened it:

"!!!!!!!!!!!!!!!!!!!"

Mere and I both idolize Anne. She has a cooking show on the Food Network and we were reallllyyyy hoping she would win The Next Iron Chef. She is a natural teacher and is incredibly funny; the humor makes her lessons memorable and fun. I learn something new every time I watch her. I've only read the first few pages of her cookbook, but I'm already obsessed. I have to share some of these quotes with you:

"Food is like a dog; it smells fear. If you're nervous, scared, or bunched up when you're cooking, your food will sense it. But if you embrace cooking with a sense of confidence and an air of fun, your food will taste SOOOOO much better. If you change a recipe, the recipe police are NOT going to be on their way over. if you want to use three cloves of garlic instead of one, knock yourself out" (pg. 15).

"If you don't cook with salt, you will NEVER be a good cook. Salt is a flavor enhancer; it makes things taste like what they are [...] Salt is not something to be scared of. If you cook from scratch with good-quality fresh ingredients- meaning seasonal produce and high-quality meat- and you steer clear of prepared, processed, frozen, canned, and of course fast food, then you can salt your cooking with reckless abandon. As a home cook you'll never get close to using the amount of salt found in most processed and packaged foods" (pg. 16-17).

"Sale (salt) and Pepe (pepper) are not married. they are only dating. Sale makes the party; she's the life of the party. But Pepe isn't usually invited to my party- he's too strong, so I tend to leave him home" (pg. 17).


I love the term "reckless abandon". More quotes and lessons to come. I hope you all had a very lovely Christmas and a fun New Year. Perhaps Meredith and I will be more consistent bloggers in 2012 :)

Friday, December 16, 2011

new ideas...for me, anyway

Hi friends.  Wanted to share with you all some food things this week that may be old news to some of you, but they were a revelation to me.

1) add feta to rice pilaf to spruce it up (my friend Kristi, aka my roommate, taught me this the other night and it's so easy and delicious.  I don't know why I've never done it before.  She used a quick cooking rice pilaf mix and it was DELISH.)

2) along the rice train, add feta (or blue cheese or goat cheese...mmm!) to hot orzo with some fresh herbs for ANOTHER way to dress up orzo/rice.  The best part?  You don't have to re-heat it the next day because orzo is great cold.  Add a squeeze of lemon and a drizzle of olive oil for a little boost for next-day leftovers.

3) nutella hot chocolate.  yes. I'm serious.  I have had 2 previous attempts at making hot chocolate here at the Mayo/Kurzen household (some of our best friends are staying with us for a couple months) and both attempts were not well received by the others.  So, I read on Pinterest (Naturally.  Can I have an independent thought anymore?) about stirring a big tablespoon of nutella into hot milk to make this delightful creation and DELIGHTFUL IT WAS.  oh my goodness it was sensational.  And easy. And better than any powder mix you can buy.

Ok, I'm sure most of you have been adding cheese to rice and thought to stir nutella into hot milk for a long time now, but for me, these were just incredible new bits of food knowledge.  Hope you try these things if you haven't before!

Tuesday, December 13, 2011

Olive Oil Cake with Blueberries and Mascarpone

This recipe is for those of you (kate) who do not like super sweet desserts.  It is perfectly light, moist, and delicious without being overpoweringly sweet.  Forgive me for not having a picture of the final product with the blueberry sauce and mascarpone (which, by the way, is a garnish- don't go out and buy mascarpone if you don't already have it).  This would be a perfectly lovely dessert to serve if you have served something rich and heavy for dinner but still want to have a little something.  Also, you could substitute the blueberries for your berry of choice.  This recipe is Anne Burrell's.......boy do I love her.  Oh, last thought: don't let this cake scare you because you think it will taste like olive oil....it doesn't.


Serves 6

For the cake:

  • 3/4 cup extra-virgin olive oil, plus extra for brushing
  • 5 large eggs separated, plus 2 additional whites
  • 3/4 cups sugar
  • 1 meyer lemon, zested (I used an orange and a regular lemon to achieve the sweet 'meyer' lemon flavor)
  • 1/2 cup sweet sherry
  • 1 cup all-purpose flour
  • Pinch salt

For the topping:

  • 1 pint blueberries
  • 1 lemon, zested
  • 1/2 cup sugar
  • 1 cinnamon stick
  • 1/4 cup water
  • 1 pint mascarpone
Directions: 

Preheat oven to 350 degrees F.

Line the bottom of a springform pan with parchment paper, and brush the sides with oil. (you have to cut the parchment paper to fit the circular shape of the springform pan- if you're not sure what a spring form is, it's the same kind of pan you use to bake cheesecakes)

separate your egg yolks and whites

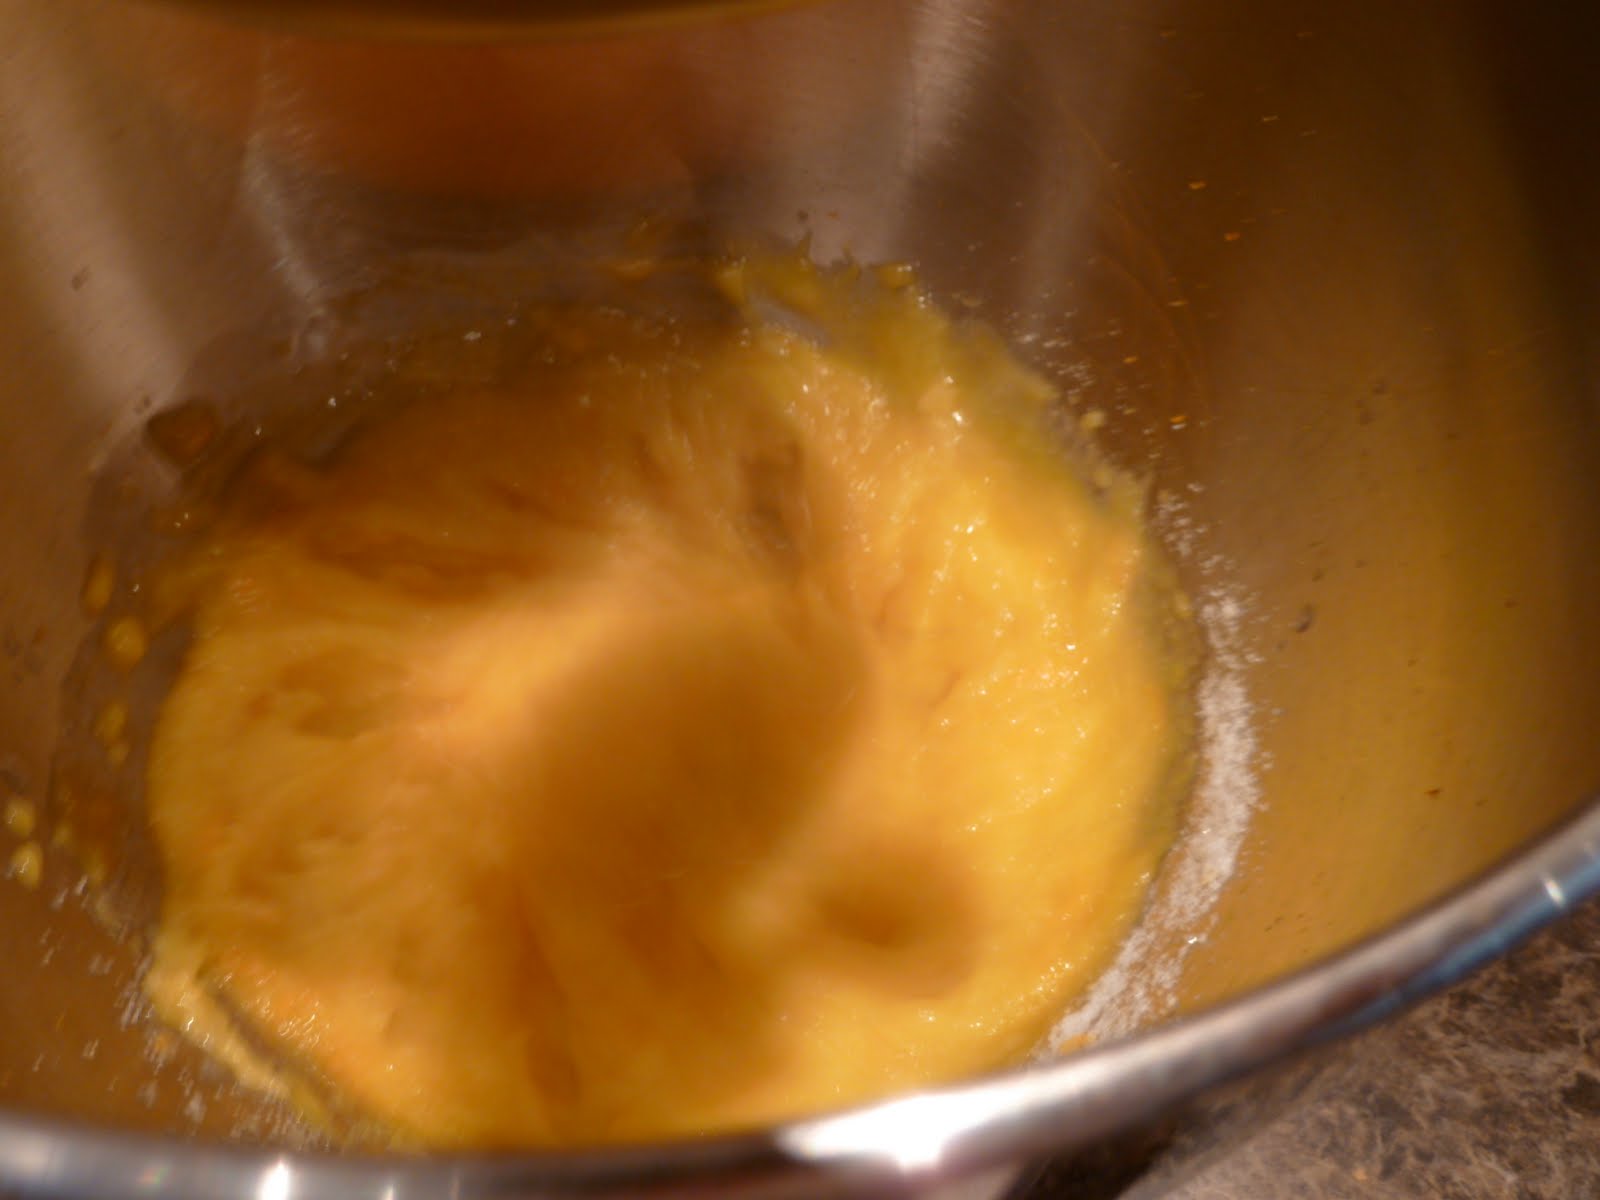
 In the bowl of your mixer, combine egg YOLKS, the sugar, and the lemon zest (move the whites very far away so you forget about them and don't confuse them with your yolks- I've done it before)

'zest' is the skin off of the orange/lemon.  If you don't have a zester, you can use the small side of the grater (not the smallest because the zest will just get stuck)

Beat your egg yolks, sugar, and zest on medium until they have turned very pale and become thick and have doubled in size- like so:
ok you can't tell they've doubled, but I had been beating them for upwards of 8 minutes at this point.  It did the job.

ok now measure out your 3/4 cup of olive oil and 1/2 cup sherry:


PS, if you've never worked with sherry before, this is what it looks like (you can find it with cooking wines with the oils and vinegars):
Now that you have your oil and sherry measured, turn your mixer on low and slowly pour in your oil and sherry.  Once it is combined, stir in the flour with a wooden spoon, mix until combine (but don't over mix!)

here's what your batter will look like

now, time for those eggs whites!  they MUST be room temperature in order to form the stiff peaks. So, in another bowl, beat your egg whites with a pinch of salt until they form stiff peaks, like so:

you see how they are getting thick and foamy?

when you can take a utensil and remove some of the egg whites without the egg whites remaining attached to the rest of the egg whites, your peaks are stiff (think of it like when mozzarella cheese stays attached to your fork and plate when you're eating pasta- you DON'T want that affect with egg whites.  They must be stiff and firm.  You pickin up what I'm puttin down?)

Now that you've beaten your egg whites, you're going to fold them (in 1/3 increments) into the batter. 

ok here's the first third.  'Folding' basically means that you are going to incorporate the egg whites from the bottom up, if you will.  So, put your spatula in the middle of that egg white mixture to break it up, then, as if you are in you're high school color guard with a ribbon in your hand, guide that egg white mixture to the bottom of the pan to coat it with batter, then in a circular motion, bring it back up (Ok, this probably isn't making any sense.  Melissa and C-Anne, if you're reading this and want to learn how to make this cake, you might need to just YouTube how to fold). Moving on.  I'm confusing myself.

Alrighty, once your egg whites are fully incorporated in, pour the batter into your prepared spring form pan and bake at 350 for 45 minutes.  I thought mine looked a touch brown on top, but it ended up being perfectly fine.  Let the cake cool for 10 minutes, then remove the pan's sides and let it cool completely.  Now let's get to this magnificently delicious blueberry topping (which, I might add, can be used as pancake syrup or you could use raspberries instead to use in a chocolate cake...oh the options!)

Topping:

Combine the blueberries, lemon (or orange) zest, sugar, cinnamon stick, and water in a saucepan.  Bring this mixture to a medium simmer and let it cook/reduce/thicken up (all that good stuff) for 20-30 minutes.  If you're blueberries aren't bursting naturally, you can use a masher or a fork to do the job.  remove the cinnamon stick and let it cool.   I would have pics of this if I had been thinking clearly that day, but since I wasn't and I don't have pics, you'll have to take my word that THIS.SAUCE.IS.DE.LIC.OUS. legit.  SO yum.  

This is where it would be phenomenal to have a picture of the finished product, but again, I was a slacker, so picture this: a piece of moist, golden, light and airy cake sliced, topped with a ladle full of that sweet, yet not- too-rich blueberry compote and all balanced out with the creaminess of a dollop of mascarpone cheese.  Now doesn't that sound heavenly?  Especially when you are craving a little morsel of goodness but don't need a rich chocolate cake to satisfy that sweet tooth?  Thought so. 

Sunday, December 11, 2011

Roasted Brussel Sprouts: Fear Not!


People. Have we talked about this?

Sometimes I forget what I share with you and what I just think about sharing with you.

Brussel spouts. I know you think you hate them. Apparently it's like the cool thing to hate brussel sprouts or something. Stop it. Stop it now.

When December roles around I go into seasonal vegetable depression. During the fall I freak out and obsess over autumn vegetables. From September to November I make squash soups and pumpkin breads and root vegetable purees. Following the Thanksgiving cooking frenzy full of such things, though, I come down with a terrible case of flavor fatigue. In times like this I can't stand to look at one more dad-gum acorn squash. No more! I can't eat any more squash! I miss the fresh, bright flavors of spring and summer. My body tells me that it has had its fill of beta-carotene and demands something GREEN.

Enter the pariah brussel spout. It's green, it's in season during the winter, and it has a unique flavor that offers some solace from all the worn out fall veggies. Alex Guarnaschelli (Food Network star and hopeful Iron Chef-to-be) says that if you have had a brussel sprout and hated it, then you had a brussel spout that was cooked incorrectly. When boiled, these little morsels of delight come out bitter, ugly, and, well, not so delightful.

But when roasted, they become crunchy, flavorful, and some-what sweet with a rich, meaty texture.

Making them is as easy as pie, too. (By the way...where did that saying come from? Pie is NOT easy.)

Pre-heat your oven to 400 degrees. Wash and trim your brussel spouts. Cut them in half. Put them on a baking sheet. Drizzle them with olive oil. Sprinkle them with salt and pepper. (Add shallots and garlic if you're feeling fancy). Roast the little babies for 20-30 minutes until golden brown. When they are just on the brink of being burned, but aren't quite burned yet... they are done.

Save yourself from a sad winter existence and re-try the brussel sprout. Just because it has a bad rap doesn't mean that it actually tastes bad...just that some people are bad cooks.

Friday, December 2, 2011

Mango Dal


Once upon a time I loved Indian food.

Once upon a time my husband hated Indian food.

Once upon a time I cried about this.... literally. Because I'm emotional. And because I wanted to cook it. And because I was imagining a future life in which I would never be able to cook Indian food for my husband.

Once upon a time I married a sweet, self-sacrificing boy who begged me to cook Indian food so I would stop crying.

Once upon a time I made "mango dal". You can find the recipe here. It was delicious and we both loved it. And it was healthy. And it as super fun to make. And I may have sauteed a pound of big beautiful shrimp to accompany the mango dal in order to thank the sweet, self-sacrificing boy for being sweet and self-sacrificing.

Once upon a time, a few weeks later, the boy requested mango dal for dinner.

Once upon a time I stopped crying and proclaimed victory.