Thursday, March 31, 2011

Sweet Potato and Black Bean Chili (crazy good...and healthy!)

....and did i mention it is cheap?  kate discovered this recipe from www.eatingwell.com and boy am i thankful she did.  i'm not gonna lie, at first i thought "black beans and sweet potato?  homegirl is crazy" but HOLY MOLY!! IT'S INCREDIBLE!  it is more like a soup than a chili, but it's so good who cares what people want to call it.  i tried to take pics of me going through the process so we'll see how this goes. 

Ingredients:
  • 1 tablespoon plus 2 teaspoons extra-virgin olive oil
  • 1 medium-large sweet potato, peeled and diced (pics below on how i cut mine)
  • 1 large onion, diced
  • 4 cloves garlic, minced
  • 2 tablespoons chili powder
  • 4 teaspoons ground cumin
  • 1/2 teaspoon ground chipotle chile (I used cayenne pepper instead)
  • 2 1/2 cups water (I used chicken stock)
  • 2 15-ounce cans black beans, rinsed
  • 1 14-ounce can diced tomatoes
  • 4 teaspoons lime juice
  • 1/2 cup chopped fresh cilantro
before we view the directions here are my pics on how i cut my sweet potato (keep scrolling down for the directions if you've got this part in the bag)


so obviously i peeled it, and then i cut it in half lengthwise.  i couldn't take a picture of that part because it took both hands.  use a large, sharp knife when doing that.  this picture, though, is the sweet potato with its' little hiney cut off so i could sit it up right and cut it lengthwise to make it thinner (see below)


so i cut them into "fingers" (so i call them) and then start to cube them. 

and now we continue with....

Directions:
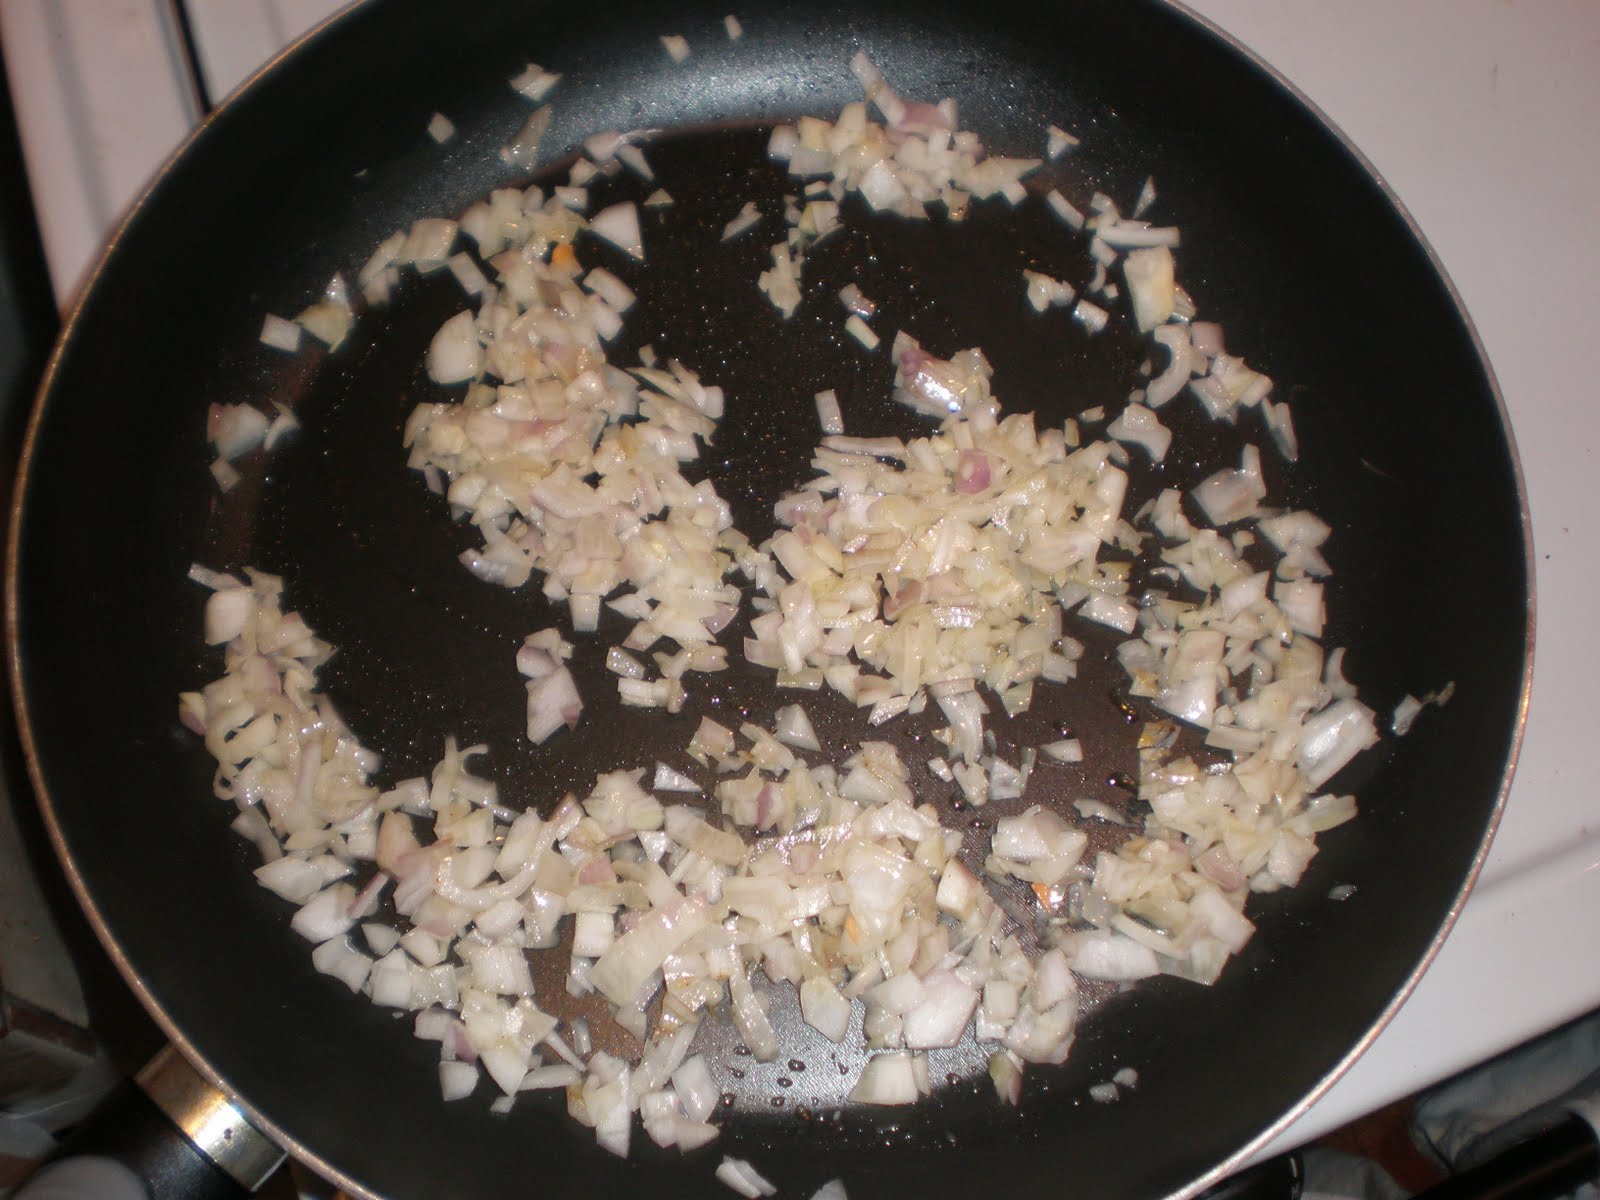
  • heat oil in a large pot oven over medium-high heat. Add sweet potato and onion and cook, stirring often, until the onion is beginning to soften, about 4 minutes.You'll want to add about 2 teaspoons of salt at this point.
  • add garlic, chili powder, cumin, chipotle/cayenne pepper and cook, stirring for 30 seconds. Add water/chicken stock and bring to a simmer.  Add a pinch more salt. (I know I sound salt crazy but I promise you it brings out flavor- if you feel crazy, just remember you are not consuming every ounce of salt you put in- it gets spread around!)
  • cover, reduce heat to maintain a simmer and cook until the sweet potatoes are tender, 10 to 12 minutes.
  • add beans and tomatoes, turning the heat back up to high to bring to a strong simmer.  the second it looks like it's bubbling a bit, turn it back down to low for about 5 minutes.  I tasted it at this point and it was good, but too chili powder-y so it needed the other flavors to be brought out so what did i do?  you guessed it.  added a couple pinches of salt.  don't worry, my heart still likes me.

  • turn off the heat and allow the soup to sit 15-25 minutes before serving (trust me, it WILL stay hot this just allows the flavors to really merry together)
  • serve with lime and cilantro- they reallllyyyyyy bring out the flavor!  they're not to be missed!
oh, and i doubled this recipe and it fed 6 people plus some leftovers that could probably feed 2 people but who are we kidding, i will eat all of it in one sitting.

side note: i also made some delicious carrot cake cupcakes tonight so instead of posting again i will simply show you the photo and share the link with you:
http://www.foodnetwork.com/recipes/paula-deen/grandma-hiers-carrot-cake-recipe/index.html


goodnight. 

Lasagna disclaimer!!

IF YOU ARE MAKING YOUR OWN RICOTTA USING INA'S RECIPE, YOU WILL MORE THAN LIKELY NEED TO DOUBLE IT TO MAKE ENOUGH TO EQUAL 15 OZ!! 


oh and i made a yummy "chili" tonight that i will post in a sec, but i wanted everyone (hi kate) to know about that little disclaimer!

Wednesday, March 30, 2011

Lasagna

Hello Friends.  Well, Kate, anyway.

Last night I had some fabulous friends over who have served on our student spouse committees to help sara and I make it through this year- shout out to all of you, we couldn't have done this year without your help.

So, what do you make when you have to feed 10+ people?  Lasagna, naturally.  I've tried many lasagna recipes in my day, all of them being wonderful, but I gotta say, I have found one (thanks to Sara Welch) that I particularly enjoy because it uses NO BOIL LASAGNA NOODLES.  that's right people, it's revolutionary:  ALL THE WORK IS TAKEN OUT OF LASAGNA WITH THESE THINGS!! And their texture is just as tender is boiled lasagna noodles.  I know, I couldn't believe it either.  Here's what it looks like:


On the back of this box is the recipe I use.  I'll write it out for those of you who cannot find these noodles and who have to boil them (I'm sad for you if that is true.  To all of my air force friends- the commissary sells these).


Ingredients:
  • 1 box barilla no boil lasagna
  • 2 eggs
  • 1 container 15 oz ricotta (or make your own ricotta.  I've done it.  It's simple and DELICIOUS. Here's the link: http://www.foodnetwork.com/recipes/ina-garten/homemade-ricotta-recipe/index.html )
  • 4 cups shredded mozzarella
  • 1/2 cup grated parmesan
  • 1 lb. italian sausage/ground turkey/ground pork/ground beef (whatever your meat of choice is, if any)
  • 2 jars of marinara sauce (i'll list my recipe for my sauce that I home make below but in case you don't have the time or energy, 2 jars will be fine)
Directions:
  • preheat oven to 375
  • spray baking dish (a 9x13 or whatever ya got) with cooking spray
  • in a medium bowl, beat eggs.  stir in ricotta, 2 cups of mozzarella cheese, and parmesan.  Here's where I like to embellish.  You will need to add salt because yes, it's fine as is, but it's kind of bland, I gotta say.  So, start with a teaspoon of salt, and a half teaspoon of pepper, you can also add a teaspoon of italian spices or oregano at this point, which I do as well.  mix all together and taste for seasoning (the raw egg won't kill you- let's not pretend like we all don't like the beaters after mixing a batch of cookie dough).  If you need to add more salt, add it in 1/2 teaspoon increments until you get the flavor you want ( it brings out flavor!!! Kate said it before and I'll say it again!! salt your food!! I'm not talking go crazy, but why eat if it doesn't have flavor!? I'll stop ranting now)
  • spoon some of the mixture onto the bottom of the baking dish and spread around
  • add your lasagna sheets (I think it's either 3 or 4 sheets per layer)
  • spread ricotta mixture onto lasagna sheets (this part is difficult at times because the ricotta is hard to spread.  I'd pick up the lasagna sheet and spread the mixture on their-thick- like you're spreading peanut butter on toast)
  • spoon a good amount of sauce over ricotta mixture (if you are using meat, you can brown the meat and add the sauce to it in the pan to incorporate the meat with the sauce)
  • sprinkle some mozzarella over the sauce layer (I've run out of mozzarella before and have skipped this part and the lasagna still turns out fine so don't fret if that happens)
  • repeat layers (lasagna sheets, ricotta, sauce, cheese, repeat until you hit the top of the pan- although please dont let it over flow- oh! and a word of advice: bake it on a baking sheet so in case it does boil over, it doesn't get all over your oven)
  • so, when you're done assembling, cover it with aluminum foil (a little trick I just discovered is to spray one side of the aluminum foil with cooking spray on the side that will lay on top of the lasagna- that way the cheese won't stick when you remove the foil for the last 10 minutes of baking)
  • pop it in the oven to bake for 50-60 minutes then remove the foil for the last 5-10 minutes of cooking until the cheese is nice and melted.  
  • recipe makes 12 servings
 voila!  I could have let the cheese melt more on top, but people were arriving to my house and I didn't want them to stand around and wait!  but it was yummy!  and that other piece of goodness is a toasted piece of crunchy bread rubbed with garlic....yes, my breath STILL reeks.  oh- and word to the wise: I wouldn't put your bread on a baking sheet unless you've sprayed your baking sheet or are using parchment paper because my bread BURNED TO THE BOTTOM OF THE BAKING SHEET.  yeah, not pretty. and not very tasty, either.  luckily some were salvageable.

Ok if you're still interested, onto my homemade sauce recipe:

Ingredients:
  • 2 carrots, 3 celery stalks, 1 whole yellow onion, all finely chopped (you can let the food processor do it if you don't have the energy to chop all of that)
  • oh, and some garlic- like, 5-6 cloves chopped up.  don't be afraid.
  • 1/4 cup olive oil
  • 2 28 oz. cans of San Marzano tomatoes.  Mine come crushed, but diced are totally fine. (if you're gonna make homemade sauce, buy the good stuff.  However, Hunts crushed tomatoes are totally fine.  I just trust the food network when they brag on the san marzanos). 
  • 2 bay leaves
  • oregano (season to taste- probably 2 teaspoons but who knows)
  • red pepper flakes
  • tomato paste (if necessary to add thickness)
  • extras: rosemary, thyme, and basil (fresh!) if you have them.  if not, no worries.  also, red wine/white wines are excellent additions if you happen to have some, or some chicken stock (I know it sounds weird just trust me!)
Directions:

  • in a stock pot, pour in 1/4 cup olive oil (or "good olive oil" as Ina would say)
  • turn the heat on to medium
  • once the oil is hot, add your garlic.  let this sautee but DO NOT LET YOUR GARLIC BURN. 
  • add about a 1/2 teaspoon of red pepper flakes (more if you want) and 2 teaspoons of oregano to let them "toast" with the garlic. You can throw in your bay leaves at this point, too.
  • once the garlic is fragrant, add your onion, celery, and carrots (pssst- if you don't have celery and carrots that's ok- onion and garlic are the important things here)
  • add about 1/2 tablespoon salt at this point.  not only does it draw the water out of the veggies, allowing them to really sautee, but you are building a flavor base- every time you add something to the pot, you need to be seasoning it.  
  • the vegetables need to be tender- let them cook for about 10 minutes, stirring occasionally. it should smell delightful.
  • open up your big cans of tomatoes and toss 'em in.  stir everything together and taste for salt- if it tastes "ok" but still a bit bland, add some salt (start with a 1/2 teaspoon and work your way up)
  • bring the sauce up to a boil and once it starts bubbling, turn it on low and let that baby simmer away partially covered either for and hour or two, or all day.  no kidding.  time is the best thing for this sauce.
  • if you are using any "extras," add the wine (i don't know, maybe 3/4 cup?) when you add the tomatoes.  you can also add a bit of chicken stock at this point (maybe a 1/2 cup then add more later if you think it needs it).
  • when you come back after running errands to check on your sauce, it should be thick from cooking down, but if it's not thick enough for your liking, feel free to stir in some tomato paste
  • stick the thyme and rosemary in whole (tie them with some kitchen twine- your butcher can hook you up with some) and fish them out later.  add them when you add the tomatoes.
  • if using fresh basil, do not use until the very end.  i mean, you can, but the basil adds such freshness and a sauce that's been cooking for a long time like that needs some freshness so just wait it out.
side note: i have put 1-2 cinnamon sticks in my sauce before for a "depth of flavor" and a bit of sweetness and it's delish.

a couple of tips: don't be afraid to salt- tomatoes absorb A LOT of salt so you might feel a bit crazy, but salt it until you get flavor- it shouldn't taste like the ocean, though, so be careful.  

if the sauce seems a bit too 'acidic,' you can add some sugar (start with a teaspoon then work your way up if need be)

BUEN PROVECHO! (spanish for "bon appetit!)

Tuesday, March 29, 2011

Health + Mexico + Breakfast = Delicioso

So I have called Meredith 100 times in the past 24 hours trying to process this recipe with her but she refuses to pick up her phone. So, even though it is not 100% perfect, I'm going to post it so that I can at least process it with all my imaginary readers :)

When I cook I have three goals: find something that is delicious, healthy, and cheap. (If it makes good leftovers that we can eat for several days, that is a big added bonus.) This dish accomplishes all of those things! I've found that the key to this is to use what you already have in your fridge and pantry. Here are the ingredients I had left over from last week's endeavors:


Corn tortillas, thai chilis, cheddar cheese, and leftover saffron rice.

I opted not to use the rice. However, I did decide that I could use the rest of the ingredients to make a delightful Mexican Breakfast Casserole. Here's the recipe:

Ingredients:
• 1 sweet potato, diced
• 1 can organic black beans
• 1 package of frozen corn
• 3-4 thai chilis, seeded and minced (a couple of jalapeños would work also)
• 1 large shallot, finely diced
• 10 eggs
• 9-10 corn tortillas
• 1 package (the smaller option) of lean, ground turkey
• 4 large garlic cloves, minced
• A splash of milk
• Shredded cheese to taste
• Extra virgin olive oil
• Kosher salt
• Fresh ground pepper
• Chili powder
*** 1 can crushed tomatoes---- possible addition next time

Directions:

1. Sauté the sweet potato in some olive oil over medium-low heat. Season with salt, pepper, and chili powder


(My mom advised me against adding this ingredient but I refused... and good thing! It's a great addition. Also, did you know that the sweet potato is a "superfood"? It is full of vitamin A, vitamin C, iron, and potassium)

1b. At the same time, sauté the shallot until translucent over medium-low heat. Season it with salt. Once it starts to soften add the garlic and minced chilis.


2. When the sweet potatoes are almost done (taste to test! As they start to soften…) add the corn and heat it through. Once the corn is warm and the sweet potatoes are soft, turn off the heat.

2b. Add the meat to the onion mixture and cook it through. Break it up with your spatula and season with salt, pepper, and chili powder.


(I had a picture of the meat for this step but decided it was gross. Chilis are prettier to look at.)

3. Brush 6 corn tortillas with olive oil and layer them on the bottom of a 9 X 13 pan.


4. Drain and rinse the beans. Get all that yuck sodium off of them.

5. Layer the vegetables and meat on top of the tortillas.


6. Beat the eggs with the milk, cheese, and a little taste of olive oil (or butter if you hate your heart). Season them with salt, pepper, and chili powder


7. Pour the egg mixture over the vegetables.

8. Brush 3-4 more tortillas with olive oil. Cut them into strips and lay them on top of the casserole in a grid pattern to make it look like a pretty pie.

9. Bake at 325 for 45 minutes or until it is golden brown on top and all bubbly and delicious looking


NOTES:

Don't forget to season at every step! This is so so important in order to build layers of flavor.

The casserole was a smidge dry. Serve it with some high-quality salsa and it fixes that little problem right up. The taste is DIVINITY. Next time I think I will add a can of organic crushed tomatoes in order to help keep it moist. Thoughts?

Also, I have a severe prejudice against frozen and canned foods. I legitimately think that I am too good for them and they totally gross me out. But, as you can see from this recipe, I am getting over it. I am learning that if you buy the good stuff, fruits and veggies are canned/frozen at the peak of perfection and thus retain their nutrients and taste. Also, they're a bargain.

This costs me $11 to make! And we'll be eating it all week. You just can't beat that.

Sunday, March 27, 2011

Hangover Cure


So Anthony and I have these two friends that went on a date to a strawberry farm. Cutest. Date. Ever. Right? After they frolicked in the fields like the Von Trap children, we all went back to Boheme to partake in some more of the delicious sangria I mentioned before. Needless to say, I woke up this morning with a horrific headache. Whoops. (I only had two!)

The ONLY thing that sounded good was a smoothie, which Meredith showed me how to make over spring break. Luckily, our friends shared the wealth of their harvest and had given us a bundle of beautiful fresh strawberries. I always have plain, organic yogurt on hand so, with these ingredients, I was good to go. After I dragged myself off the couch and out of my pathetic heap of self-pity, I combined the strawberries and yogurt with some flax seed, honey, and ice cubes in a blender until smooth. It was just the thing.

I wish I had had some Clementine oranges or left over limes to add… that would have been so delicious. Also, Meredith uses frozen fruit so she doesn’t have to add ice. I wish I could give you exact measurements, like “1 cup of yogurt” or whatever, but that’s just not the way I cook. I eye-ball it. Use however much looks good to you :)

Now let’s talk about flax seed. It rocks. Meredith, I have to give you all the credit for this one, too. You introduced me to it. Flax seed has little to no taste, adds some crunch, and is packed full of stuff that is super good for you. It is full of fiber, calcium, vitamin E, and Omega-3 fatty acids. Apparently in the 8th century, King Charlemagne passed laws requiring his subjects to consume flax seed because he believed so strongly in its health benefits. It’s not that expensive and you can add to so many things for a little nutrition boost! (I put it in some homemade granola the other day). Oh, p.s., I got all my information from webmd.com… I don’t actually know all that stuff.

(Note: Betsy, if you are reading this, please don’t think I’m a bad big sister who is a negative influence on your adolescent development. Don’t drink alcohol until you’re legal, learn your limits, and be smart… which you are so I’m not worried.)

Pancakes and Homemade Syrup

If you're like me, a newly wed with a limited grocery budget, you can't afford to buy maple syrup at $6.99 a bottle for the occasional pancake breakfast.  I mean, I love the stuff, but it's just not worth buying unless I'm going to be using it for a few recipes.  So, instead of buying the artificial stuff (that Scott loves but I cannot handle), I simply make my own homemade syrup.  I know, I'm a posh princess food snob.  I'm not afraid to admit it.  So here's what I do:

  • 1 cup of brown sugar
  • 1/2 cup water
  • bring this to a boil, then reduce heat to medium to let reduce by half, until it is thick and "syruppy"
you could stop here and have perfectly fine syrup, but why stop there?  Here's another idea:

  • 1 cup of brown sugar
  • 1/2 cup water (btw this is good for 2-4 people)
  • frozen blueberries- about a cup or as much as you like
  • combine everything in a small saucepan and bring to a boil.  Allow to reduce on medium-high heat until "syruppy."
  • note: if you like your syrup to be thick, you can take some of the mixture out (maybe a couple tablespoons or so- I just eyeball it) and put it into a small bowl.  Then get some cornstarch out and put a little bit in the bowl  with your blueberry mix and whisk with a fork.  It might still be a tad lumpy but that's ok- just get as many lumps out as you can.  Add this mixture back into the saucepan.  This will thicken your syrup.
You can get as creative as you want with this by adding lemon zest, orange zest, and switching out the fruits to raspberries, peaches, strawberries, whatever you like.

Here is the link to a pancake mix I use (feel free to leave out the ricotta, but I often find that I have leftover ricotta because I never use the whole tub with whatever I made):

http://www.foodnetwork.com/recipes/bobby-flay/lemon-ricotta-pancakes-with-lemon-curd-and-fresh-raspberries-recipe/index.html

Everyone's always got sugar and water!  So try your own syrup and see how you like it!  Here is a picture of the delicious pancakes I made Kate for breakfast when she came to visit.   We were fancy and called it our blueberry syrup a blueberry "compote" even though I won't pretend to know what a "compote" really is.


Thursday, March 24, 2011

Taking My Time...


Last night I went to happy hour with one of my dear friends at this awesome little bar called Boheme (you know… like the song in Rent “La Vie Boheme”??). There I had some of the best sangria of my life… seriously… I would like to learn how to make sangria. Perhaps that can be the theme of a future blog post.

But that’s not the point. The point is that because I was at happy hour, I got home late and had to rush to make dinner because I have a sweet husband who gets cranky when he’s hungry. We’ve been on a taco kick lately… not the nasty hard shell tacos you find at Taco Bell but the authentic Mexican tacos that you put on warm corn tortillas and garnish with fresh lime.

Since Anthony gave up all meat except seafood for Lent, I decided to try this great Baja Fish Taco recipe I found in my latest Cooking Light magazine. Since I was in such a rush, I didn’t really read through the recipe thoroughly beforehand and just started making the tacos.

Let me say this, the fish was amazing. The seasoning was great, they were cooked perfectly, and we got two beautiful tilapia filets for only $2.37, which is a sweet deal. HOWEVER, the sauce that went with was horrific. Truly horrific. I’ll spare you the details, but basically it had waaaayyy too much raw onion and jalepeno in it. I swear I followed the recipe exactly, but our eyes were still burning from the fumes even after we threw it in the trashcan. It was so bad. Cooking Light, I love you, but what happened here??? That needed to go through many more runs in the test kitchen.

So here’s the moral of the story. If I had taken the time to read through that entire recipe and soak it in… then I probably would have recognized that a sauce made of sour cream and raw onion would not taste good… and I would not have made it. (I am of the opinion that tacos don’t need a special sauce any way. A little chopped cilantro, fresh avocado, and lime juice is all you need. It is a truly magical combination).

This happens every time I try to cook in a hurry… it never turns out. I hate to start this blog off by admitting to a cooking failure, but I think it’s a good lesson to learn. I’ve really only been cooking for about a year and it has been such a wonderful discovery for me. It is creative, it’s therapeutic, and it’s a beautiful way to show love. I love the self expression and satisfaction of creating a lovely meal that others enjoy. That only happens when I breathe, reject my anxiety, and take the time to truly enjoy the cooking process. It’s almost as if God knows that the art of cooking is supposed to be therapeutic, supposed to be enjoyed and shared and relished in… not rushed and hurried and stressed over like the rest of our crazy lives. So when you don’t give the art its due attention, He slaps you upside the head with a bad meal and says “no, do it the right way”. Ok, maybe it’s a little dramatic to bring God into it. I’m just trying to make a point, people. Cooking is supposed to be fun, not stressful.

From now on if I don’t have the time, we’re eating cereal for dinner. It’s not worth the defamation of this wonderfully fun craft.

Here's the link to the great fish tacos with the terrible sauce:

http://find.myrecipes.com/recipes/recipefinder.dyn?action=displayRecipe&recipe_id=50400000110429

(And now I've done what I said I wouldn't do... write a ridiculously long post. Blast.)

Wednesday, March 23, 2011

Macaroni Grill's "Carmela's Chicken Rigatoni"

so this is Meredith's version of "Carmela's Chicken Rigatoni"....it's....ridiculous.

Ingredients:
  • 1 large onion
  • 2 chicken breasts
  • package of basil (or just a good handful)
  • rigatoni
  • sherry/marsala/sweet white wine
  • 1 package of mushrooms, cleaned and sliced thin (i used baby bellas because my commissary doesn't have cremini)
  • 2 cloves chopped, minced garlic
  • trader joe's 21 salute seasoning (i don't know what to tell you if you can't get to a trader joe's and get this stuff- i might marinade the chicken in olive oil, plenty of salt, pepper, and basil)
  • parmesan cheese (1/4 to a 1/2 cup)
Instructions:
  • caramelize the onion (slice the onions verrryyy thin. put them in a pan that is on medium high heat with 1 tablespoon of olive oil. once the onions are transluscent, add 1 teaspoon of kosher salt. then turn the heat down to low and stir the onions occasionally until they reach a beautiful, golden color and have shrunken A LOT. this will take anywhere from 20-40 minutes.)
  • meanwhile, pound the chicken out very thin (i just recently bought a meat mallet to accomplish this however if you don't have one, you can 1) put the chickens between plastic wrap and smack them with big heavy cans of tomatoes, for example, OR you can put them in a bag and pound with a sautee pan.) after they are pounded thin, sprinkle on both sides with trader joe's 21 salute seasoning (just order the stuff online people. you need this in your life!)
  • remove onions from pan onto a plate. in the same pan, add more olive oil to coat the pan and turn the heat back up to medium-high.
  • once the oil is hot, add the chicken and sear on both sides (you should hear a "ssss" when the chicken hits the pan); probably 3-4 minutes per side
  • once chicken is done, place it on a plate and let it rest for 15 minutes, then cube it.
  • at this point, start boiling your water for your rigatoni. once the water comes to a boil, add 1 tablespoon of salt, then add your rigatoni. cook until al dente (it should have a bite to it- not completely soft)
  • in the same pan that you have just removed your chicken from, add your mushrooms and garlic (pan should still be on medium-high). the pan might need some more oil at this point- add just a touch and move the mushrooms around and get them in one single layer in the pan. allow them to brown- stir them occasionally to get both sides browned.
  • add about 1 tsp salt to the mushrooms as they cook.
  • once mushrooms are browned, add your caramelized onions and cubed chicken. immediately add sherry, or whatever wine you're using. a couple of swigs around the pan should be good.
  • let the sauce reduce and thicken, making sure to stir everything around and become incorporated
  • take a measuring cup and save about 1 cup of pasta water before draining the pasta
  • add some of the pasta water to the pan (maybe not the full cup- eyeball it. you want a nice sauce to absorb all that pasta- if you need to add a little more wine, do that too).
  • add drained pasta to the pan and stir everything together, incorporating all ingredients
  • grate parmesan over the pasta and stir to incorporate
  • take the handful of fresh basil (don't even bother with the dried stuff) and tear lovingly over the pasta. use a lot. you can never go wrong with basil
tell your roommate, boyfriend, sister, brother, friend, husband, wife, whoever "TADA!!!" when you're done. It's delish.

**In the future we'll have pics for our posts- we're getting there, people.
**secondly, we are aware that some of our followers are new to cooking so we are trying to go into as much detail as possible to make these recipes accessible to all!

Monday, March 14, 2011

Welcome To Our Blog!!!


Once upon a time there were two best friends who lived across the street from each other on Bent Tree Lane. Their mother's dressed them in matching bows and took them to the beach every summer where they searched the horizon for mermaids. Their names are Meredith and Kate and now they're all grown up and still soul sisters.

We'll throw in more precious stories from our childhood in the coming posts, but for now we'll leave you with that little tidbit. One thing I've learned from reading the blogs of my friends is that it's super annoying when a post just goes on and on and on. Short and sweet: that's what everybody wants.

When Meredith and I were kids we had imaginary friends who went with us everywhere. Bitsa Bitsa and Rag Rag ran away together to get married years ago, (right around the time that we started to get too old for imaginary friends... although Meredith lives in denial and believes that they are still with us), but their spirit of creativity, adventure, and whimsy lives on in the love of cooking that Meredith and I share.

Living ten hours apart, this is our way of keeping up with each other and sharing our food adventures with anyone else who wants to come along for the ride.